| You may get .psd* file of "Silver button" Photoshop tutorial by making a payment. Put the tutorial title in "Add special instructions to seller" line of PayPal and it will be sent to you shortly. |

- Create a new 300*300 px size document, and a #102633 background.
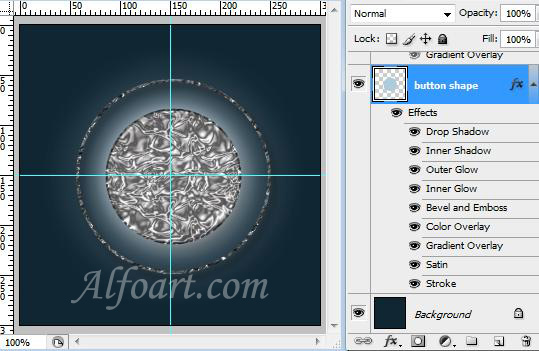
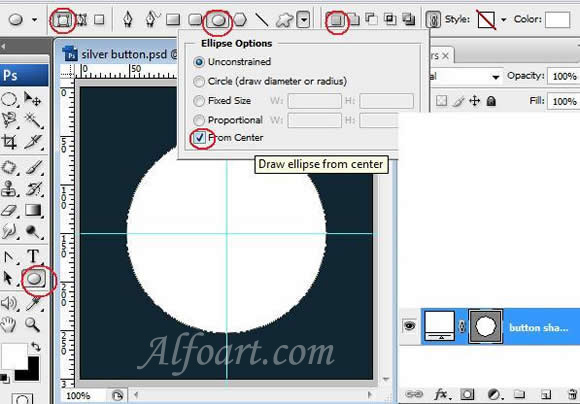
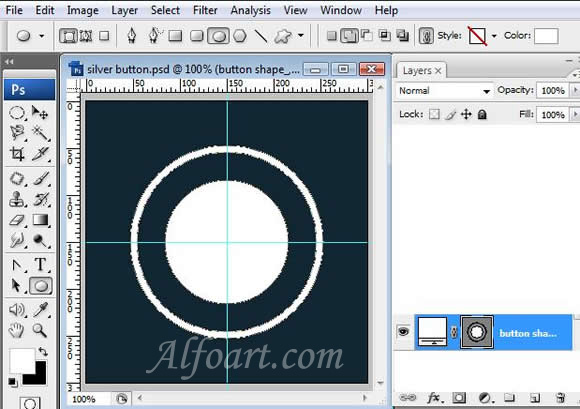
- Create a new layer and name it “button shape”.
- Choose View > Rules. Make sure View > Snap to > Document Bounds is checked and drag a horizontal guide down towards the middle of the document. Do the same thing for the vertical guide.
- You are supposed to create an intersection point located exactly in the middle of the document.
- Draw a circle using Ellipse Tool and holding Shift key.
- In the options bar, select Subtract From Shape Area button and cut out internal part of the circle.
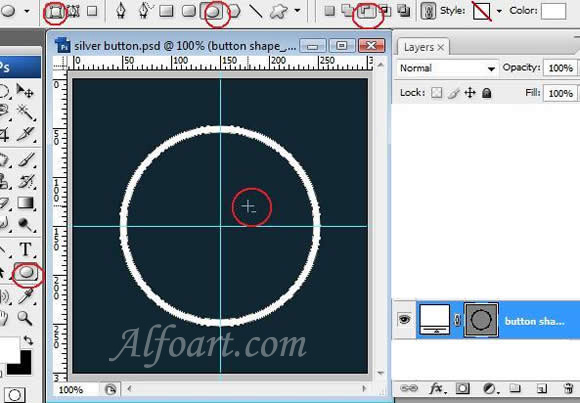
- In the options bar, select Add to shape area button to create new circle just like in the example below.
- Right click on the layer with shape and choose Rasterize Type.
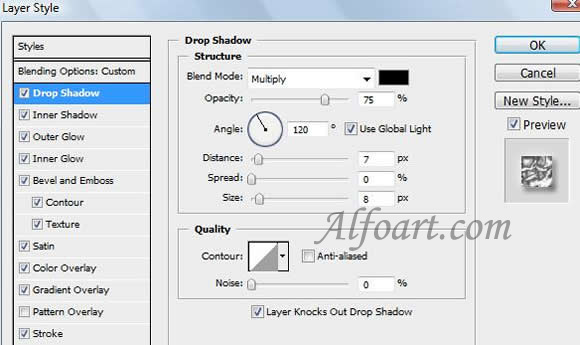
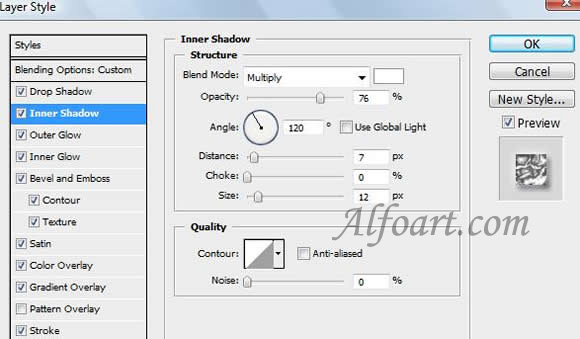
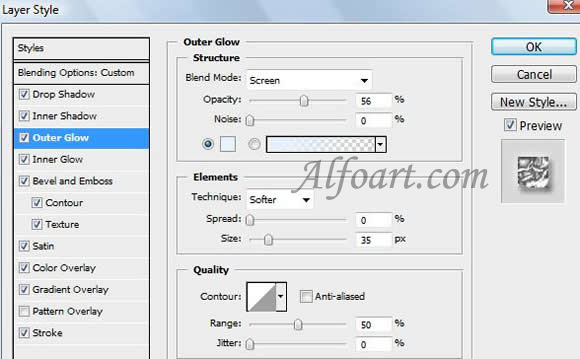
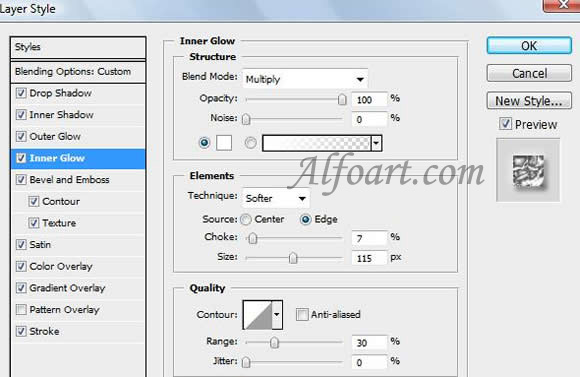
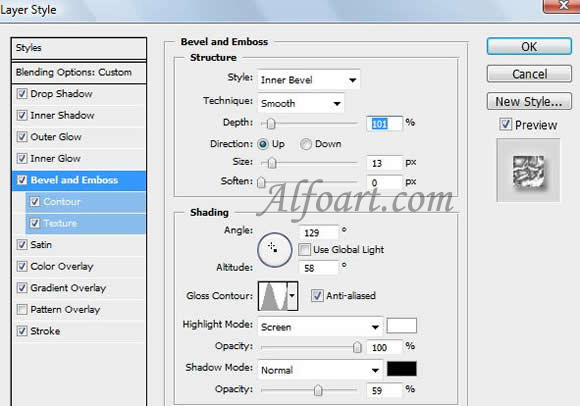
- Go to Layer > Layer style > Blending Options.
- Apply the following adjustments to this layer.