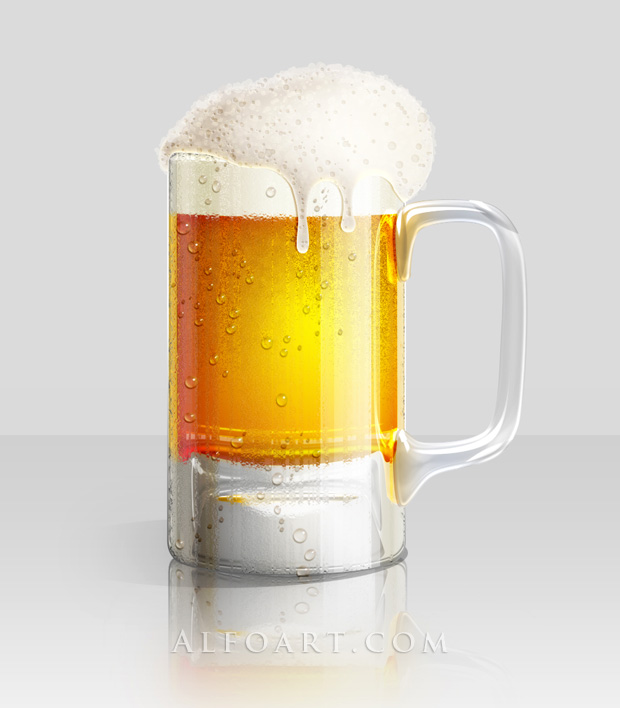
| You may get .psd* file of "Cold Beer Glass Illustration" Photoshop tutorial by making a payment. Put the tutorial title in "Add special instructions to seller" line of PayPal and it will be sent to you shortly. |
- Duplicate foam shape second time.
.jpg)
- Apply Bevel and Emboss effects to created copy.
.jpg)
- Duplicate foam shape third time. Put this layer below all of foam shape layers. Use it to create shadow effect. Move this shape left(2px) and down(1px). Apply Gaussian filter to it(~0.6). Load selection for original foam shape and remove selected area form shadow layer. Erase shade contour in red marked area with Eraser Tool.
.jpg)
- Apply light brown gradient to shadow with following settings.
.jpg)
- Create a new empty layer, choose round brush(18-20px). Draw bubbles texture next to the top contour Apply following setting for the brush and use colors close to foam shades. In order to pick right color use Eyedropper tool
 .
.
.jpg)
.jpg)
.jpg)
- Change brush settings a bit, draw bubbles texture in a new layer with Bevel and Emboss effect. Apply Fill = %20 to this layer.
.jpg)
.jpg)
.jpg)
- Bevel and Emboss, Inner shadow settings for created bubbles.
.jpg)
.jpg)
- Create one more new layer for bubbles texture, fill it with bubbles circles without any layer style settings, but make them translucent or apply Soft Light Blending mode.
.jpg)
- You may add more small bubbles with Overlay setting.
.jpg)
- Group glass layers(except handle and leaking foam, in other words, group green marked layers), copy the created group and merge it. Correct Contrast setting for merged duplicate, Image > Adjustment > Brightness/Contrast.
.jpg)
- Then apply Gaussian Blur filter to it.
.jpg)
- Filter > Noise > Add Noise.
.jpg)
- You should have something similar:
.jpg)
- Filter > Distort > Glass.
.jpg)
- In order to create dewy gall effect, download and insert special pattern. place pattern layer between handle and glass layers.
.jpg)
- Open Channels palette. Make active on of the channels(red for example) and click small icon to load selection.
.jpg)
- Return to layer palette, keep selection active, choose blurred glass layer and Layer mask to it (click layer mask icon).
.jpg)
- You should have something like this. Load selection for original glass shape, invert selection and erase outside contour from blurred layer.
.jpg)
- Draw white drops in a new layer.
.jpg)
- Use similar settings as for bubbles brush, but with white color and without Wet Edges.
.jpg)
- Use following layer style effects for them.
.jpg)
.jpg)
.jpg)
.jpg)
.jpg)
.jpg)
.jpg)
- In order to create reflection, duplicate group of glass layers once again(without leaking foam and handle).
- Merge group and apply Flip Vertical transformation to it, move created layer down. Duplicate handle layers too. Merge duplicate and apply flip transformation as for glass previously. Keep glass and handle reflections in separate layers.
.jpg)
- Apply Warp transformation for glass reflection like on the screen shots below.
.jpg)
.jpg)
- Merge handle and glass reflections.
.jpg)
- Add Layer Mask to created layer, Fill it wit black and white linear gradient. Load selection for the Mask(Ctrl + click to mask thumbnail). Invert selection, make active reflection thumbnail and apply Gaussian Blur filter to selected area(~30). Apply Opacity 70% for this layer.
.jpg)
- Draw black ellipse with Ellipse Tool
 .
.
.jpg)
- Add Layer Mask, fill it with linear black and white gradient just like on the screen shot.
.jpg)
- Load selection for the Mask(Ctrl + click to mask thumbnail). Invert selection, make active reflection thumbnail and apply Gaussian Blur filter to selected area(~45). Apply Opacity 25% for this layer.
.jpg)
And here is the result!


