Learn how to create magic photo manipulation with big curly mountain top using Content-Aware fill option and digital painting techniques. You may get large (2000 x 2600 px, 72px/in) editable .psd* file of "Christmas Gifts Mountain." Photoshop tutorial by making a payment. Put the tutorial title in "Add special instructions to seller" line of PayPal and it will be sent to you shortly.
Click to enlarge the image.

Used images:
- In this Photoshop tutorial you may find useful tips which can help you to create well blended photo manipulation with some digital painting elements. You may find some unusual ways of using Content-Aware filling option. This PS tool may help you to create the new elements of landscape without strong digital painting skills. This tutorial is written for users who know basic Photoshop tools and settings and who able to work with the medium/advanced difficulty level tutorials. It doesn't contain very detailed description for actions such as "how to create adjustment layer", "how to separate elements from background" and some others, because of big amount of steps.
- Here is the announcing animation with the all stages described in the tutorial:
- Create a new Photoshop document 2000 px x 2600 px and resolution 72 pixels/in.
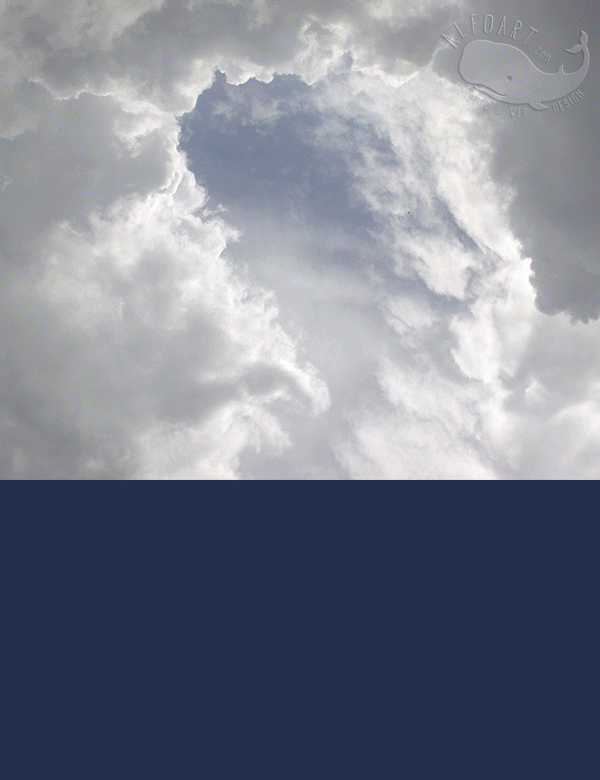
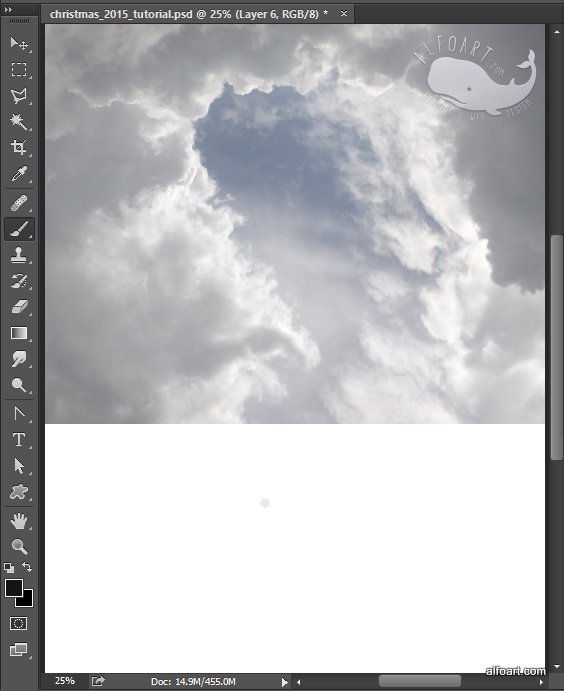
- Insert Sky image above the background layer. Flip it vertically (Edit > Transform > Flip Vertical).
- Rotate it a little bit to center clear sky spot.
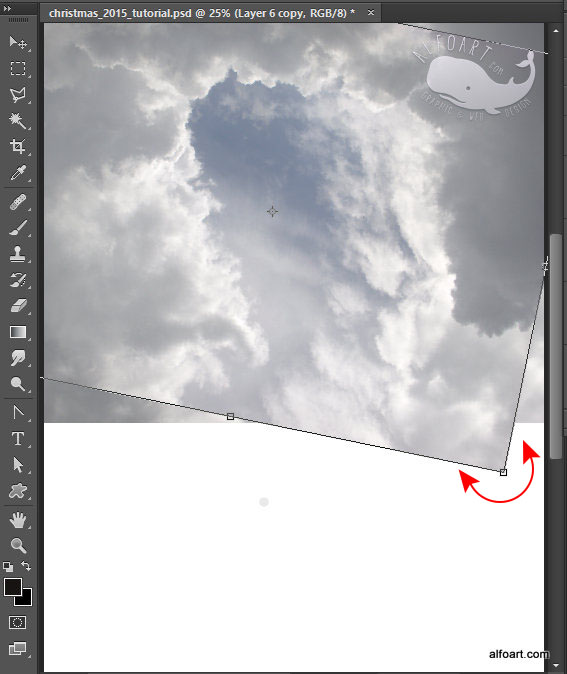
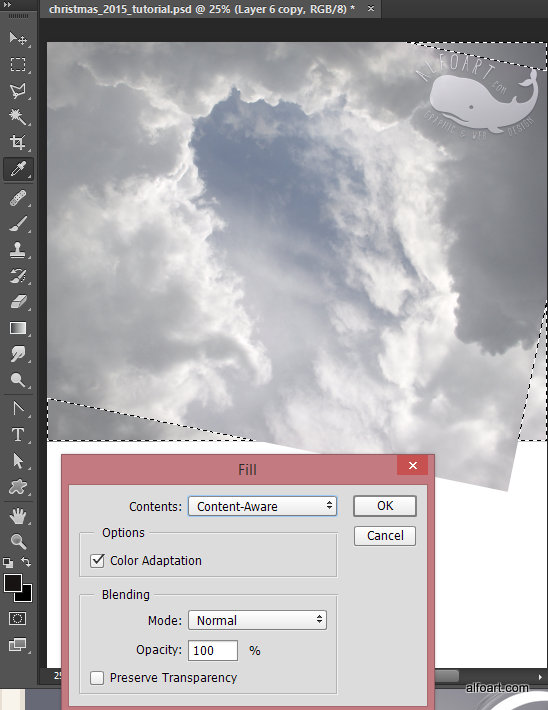
- Select empty corners after rotation with simple Polygonal Lasso Tool and fill them with Content-Aware option. Go Edit > Fill > Content-Aware.
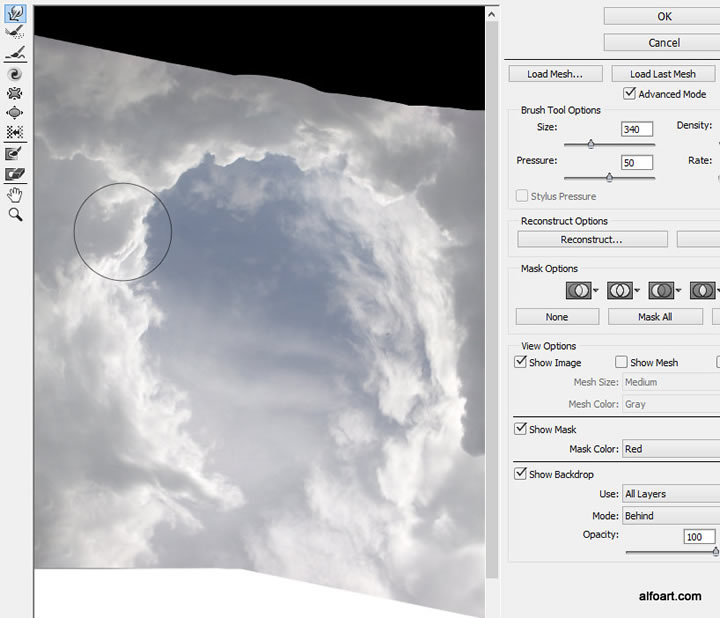
- Then go To Filter > Liquify. Make clear sky area larger and more round using Forward Warp Tool. Move the large round tool from white clouds area contour to edges of the artwork.
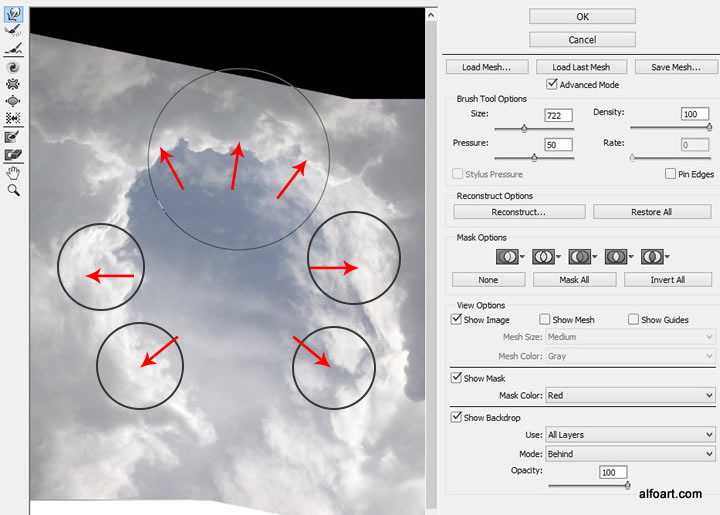
- Process the clouds area with the smaller Forward Warp Tool to make their shape nicer and more accurate. Try to create something like "round clouded frame" around the clear sky.
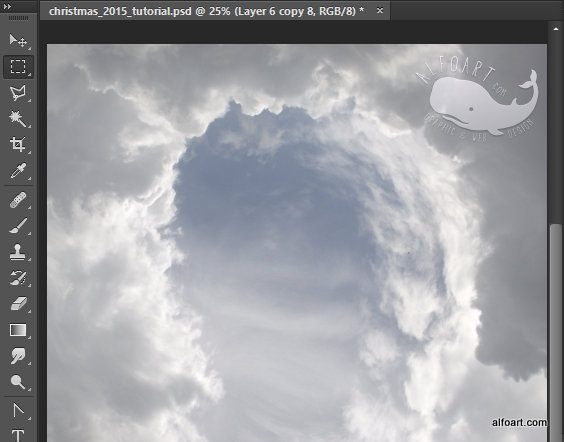
- Here is the result of applying Liquify filter.
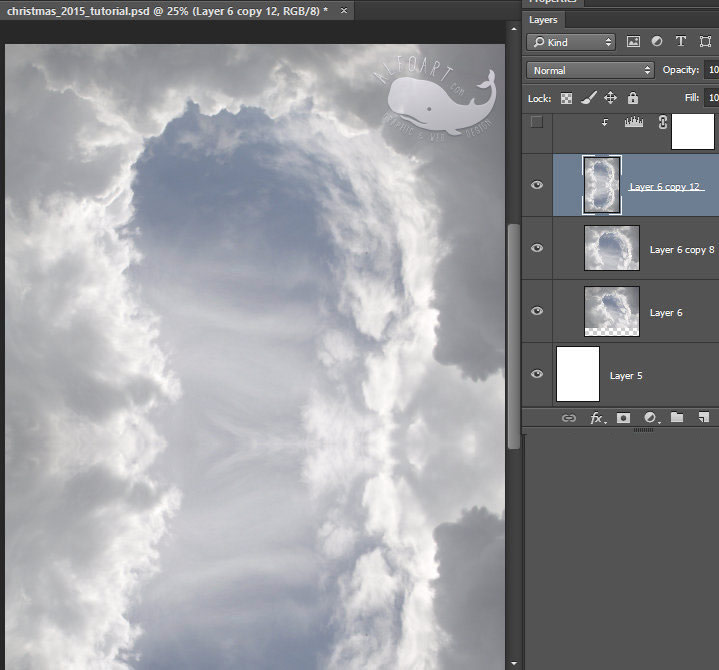
- Duplicate the sky layer, flip it vertically and move it below the original sky layer. Merge both sky layers to cover whole document.
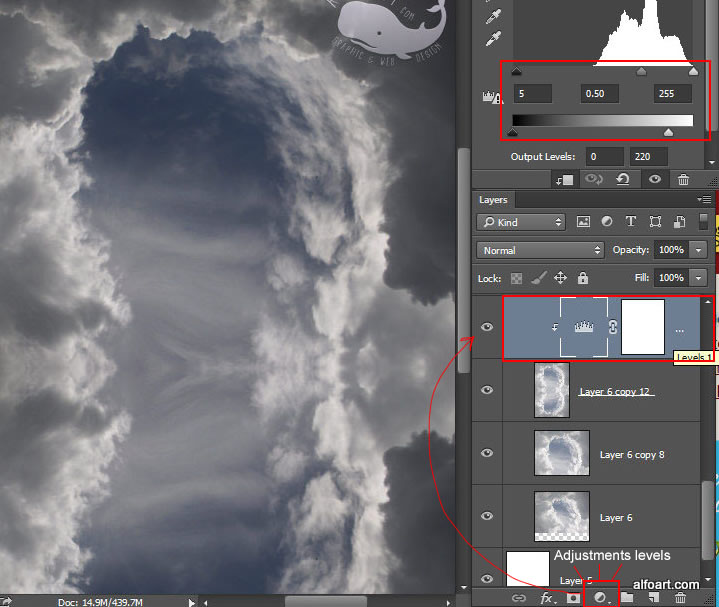
- Create Adjustment "Levels" above the merged sky layer to make the sky background darker and more contrast, use settings from right top corner of the screen shot. You may find "Levels" and other adjustments levels for the future steps by clicking small round icon in the bottom part of layers palette.
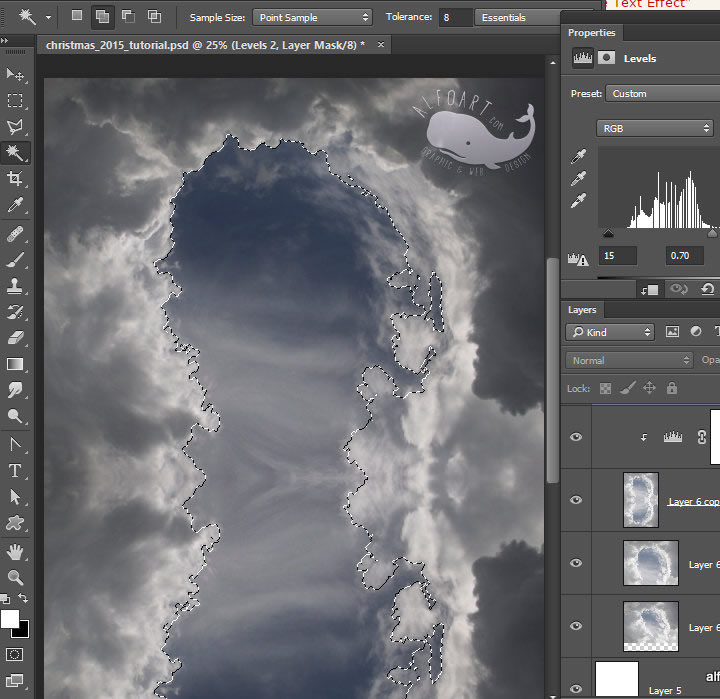
- Choose Magic Wand Tool, use it in "Add to selection Mode". Select whole central clear sky area. You may remove unwanted selection areas with the same tool in "Subtract from selection" mode (next right icon from the marked one).

- You need to have selected area similar to example on screen shot below. You may correct selection with the "Refine Edge". Go to Select > Refine edge to make selection smoother.
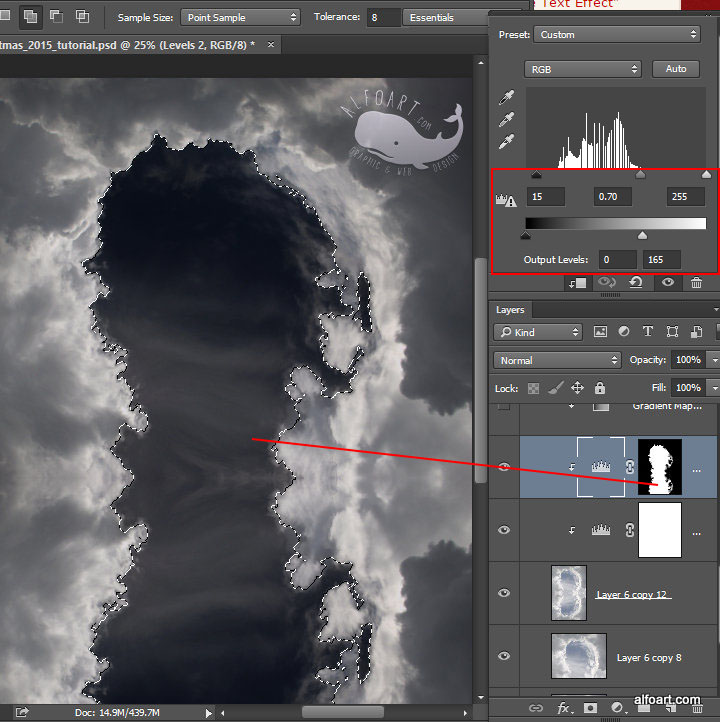
- Keep selection active and add new adjustment "Levels" layer. This adjustment layer will be applied only to selected area.
- Make clear sky area much darker. Use the same settings as on the screen shot.
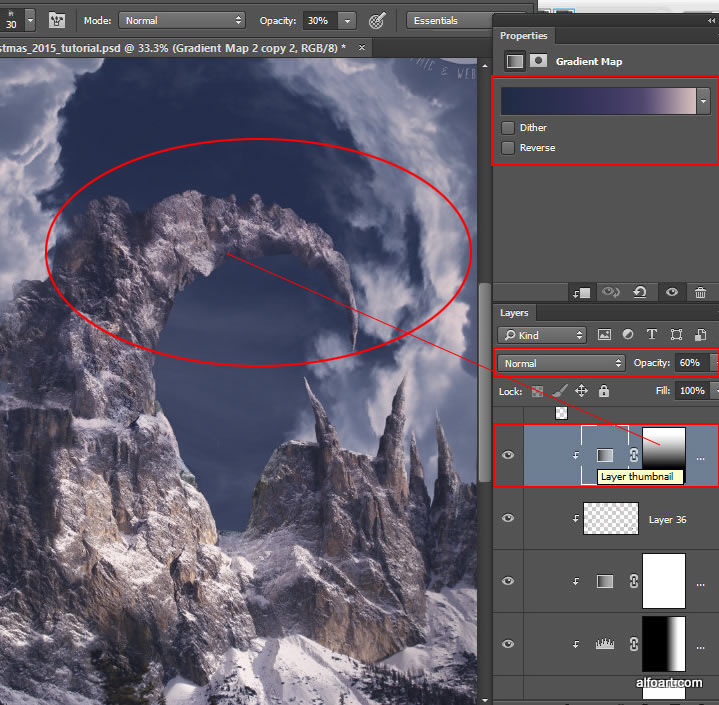
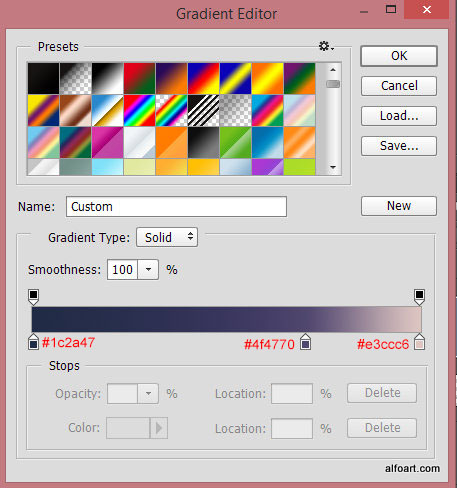
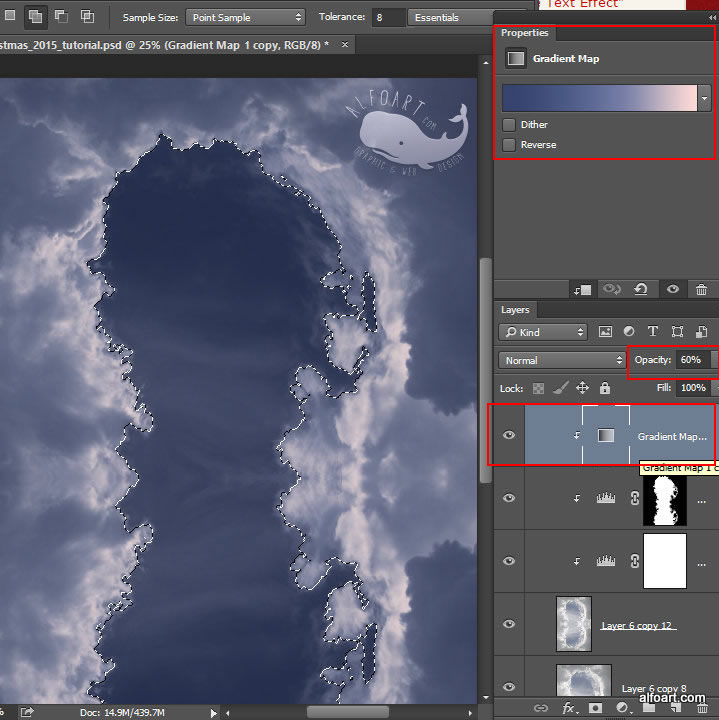
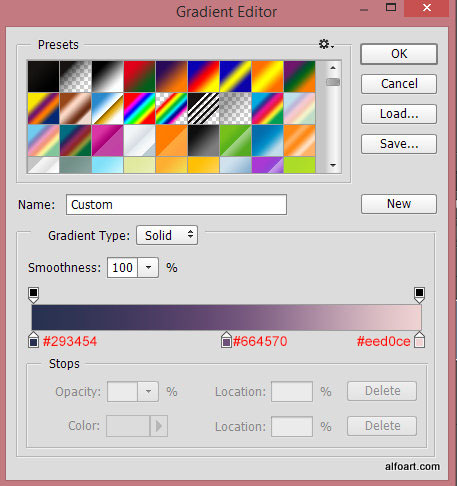
- Add new "Gradient Map" adjustment layer. Apply Opacity 60% to it. You don't need to keep selection for the Gradient Adjustment layer, apply gradient map to whole sky background. (I left selection on this screen shot by accident)
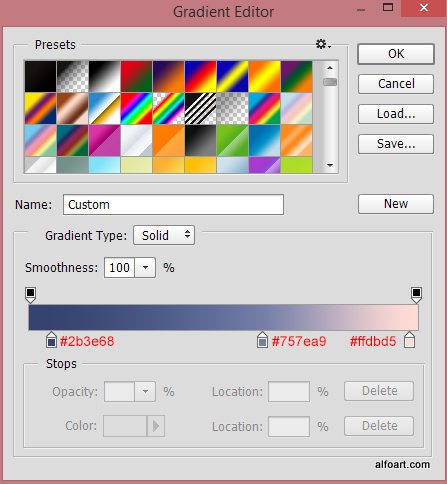
- Here are the settings for the Gradient map adjustment layer:
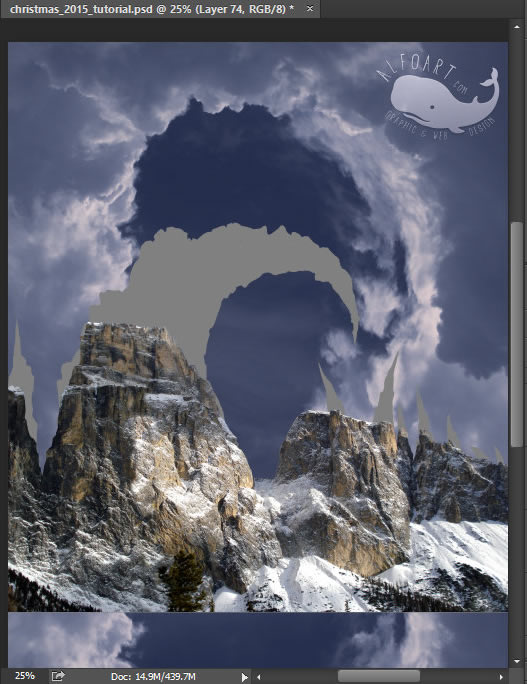
- Insert mountains image. Erase original sky area from it.

- Add the Layer Mask and Correct the silhouette of the mountains with the regular Brush Tool. You have to erase areas selected below.
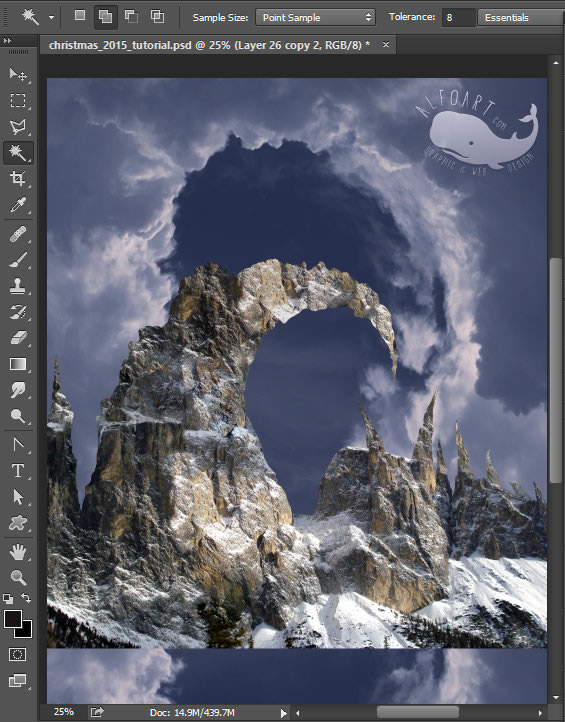
- Create a new empty layer and draw the new silhouette of the mountains. You may use regular round brush and any solid color.
- Load selection for the created gray shape (now you can make it invisible, we need it only to get selection of the mountains). Return to the mountain layer and fill selected area with Content-Aware. Edit > Fill > Content-Aware.
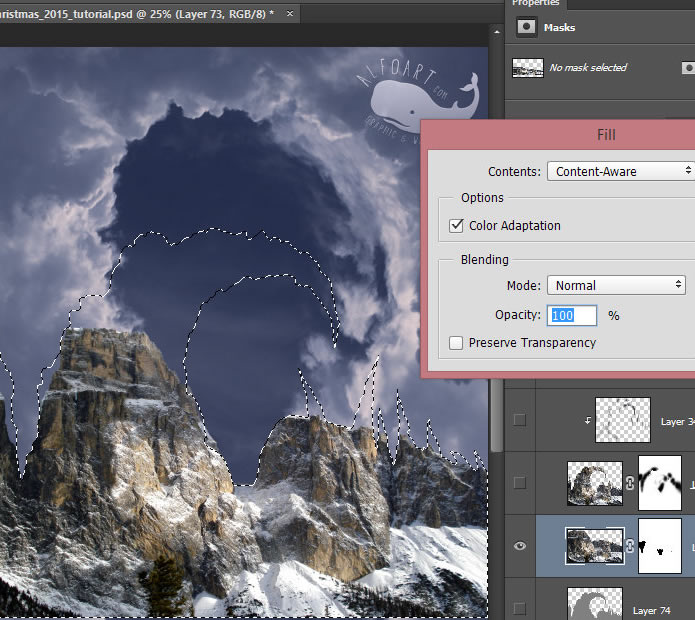
- Here is the result of applying Content-Aware filling. You may try to fill out each spot separately. This may help you to get better/more natural result.
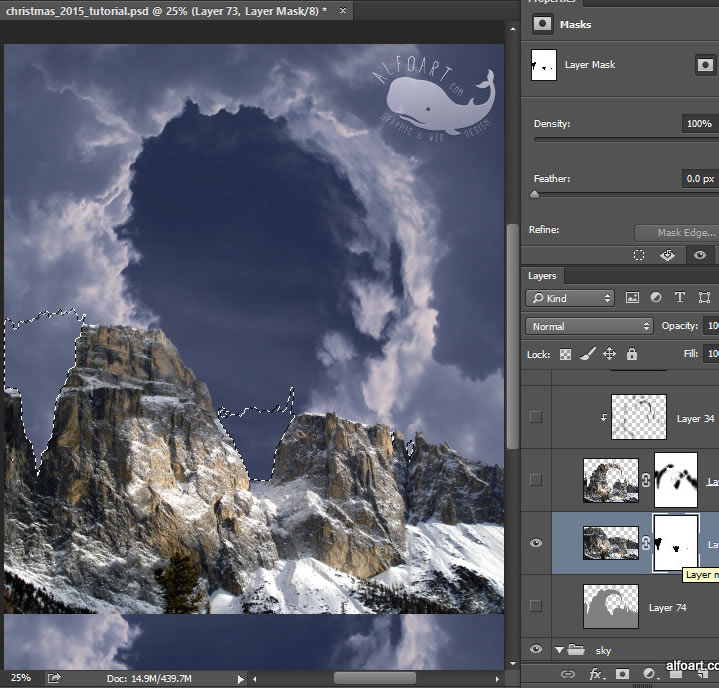
- Add Layer Mask to mountain layer.
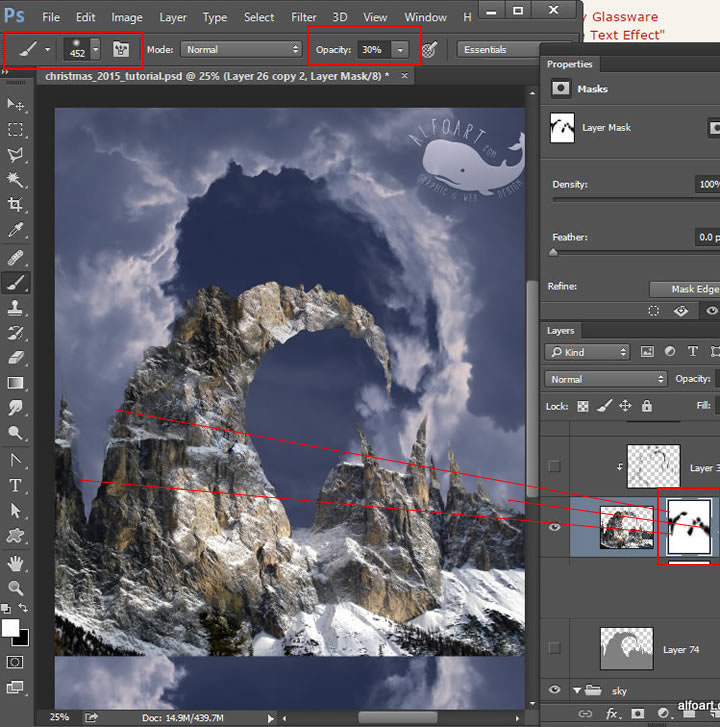
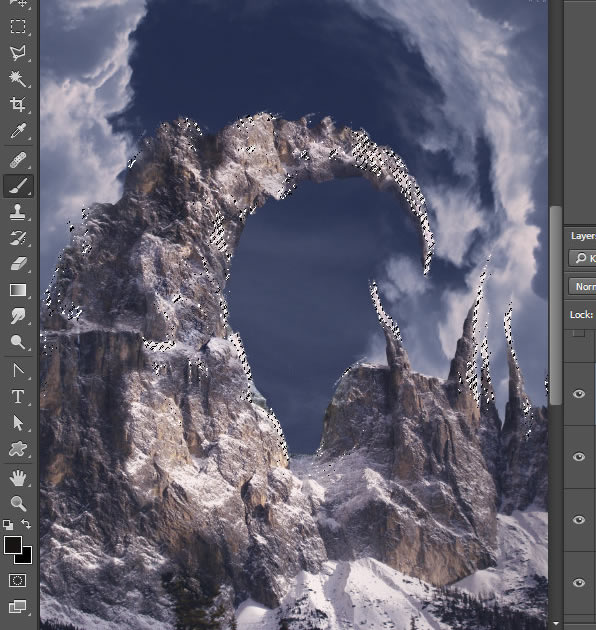
- Choose round soft and transparent (Opacity around 30%) brush an process mountains silhouette next to the clouds to create "foggy effect".
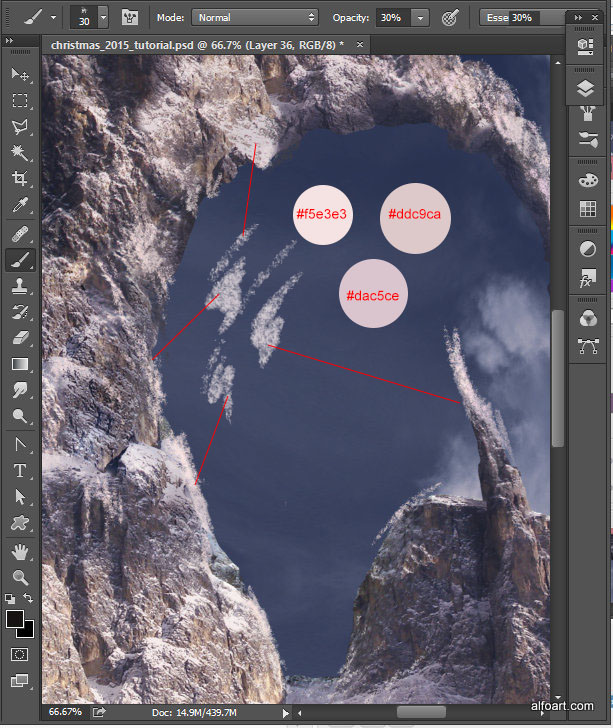
- Create anew layer or layers above the mountain to add some dark and light spots. I created separate layers for dark shadows and for the lighten areas to create volume effect. Use dark and light translucent brushes and process shadow and lighten areas of the mountains. You may use colors and shades from the sky area. Alt + click to pick the color from background.
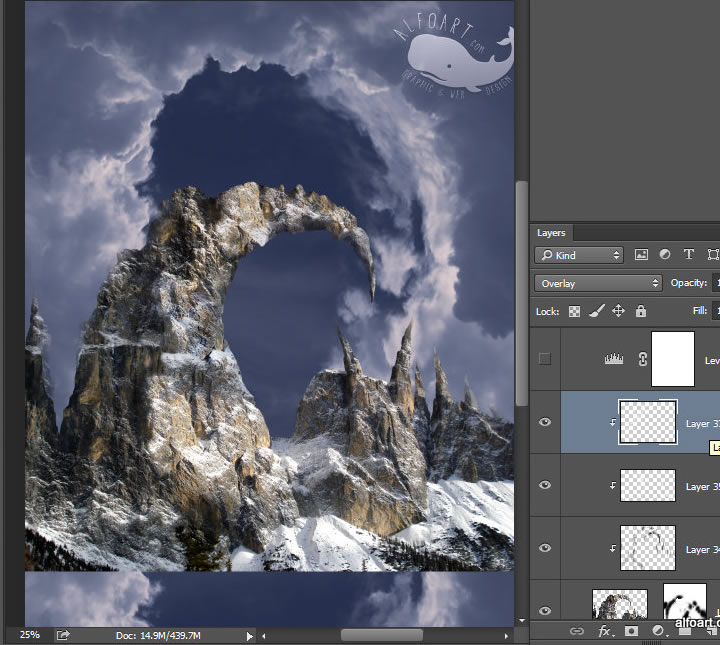
- If you create different layers for dark and light spots you may try to apply "Multiply" Blending Mode for the dark shades layer and "Overlay" or "Soft Light" Blending Mode for the light shades layer. That may help you to save texture of the mountain. Also play with Opacity settings for shades layers.

- In order to apply dark and light spots only to mountains shape convert these layers to the "Clipping Masks". Right click layer > choose "Create Clipping Mask". Clipping mask layers have small down directed arrows on the left side of thumbnail.
- Add another clipping mask layer to correct "Levels" of the mountains. Make them less contrast and smoother.
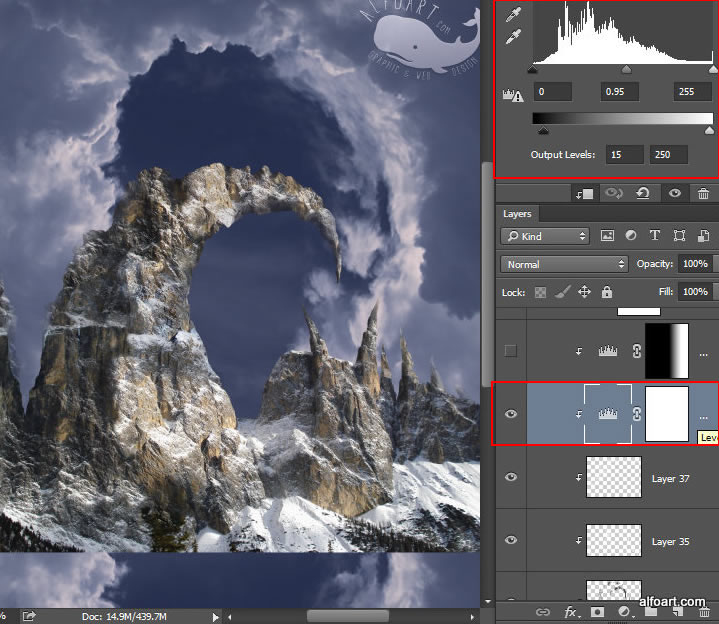
- Add one more "Levels" adjustment layer to reduce light only in the right part of mountains. Apply linear black and white gradient to the Layer Mask of adjustment layer. The left part of layer mask should be white (visible).
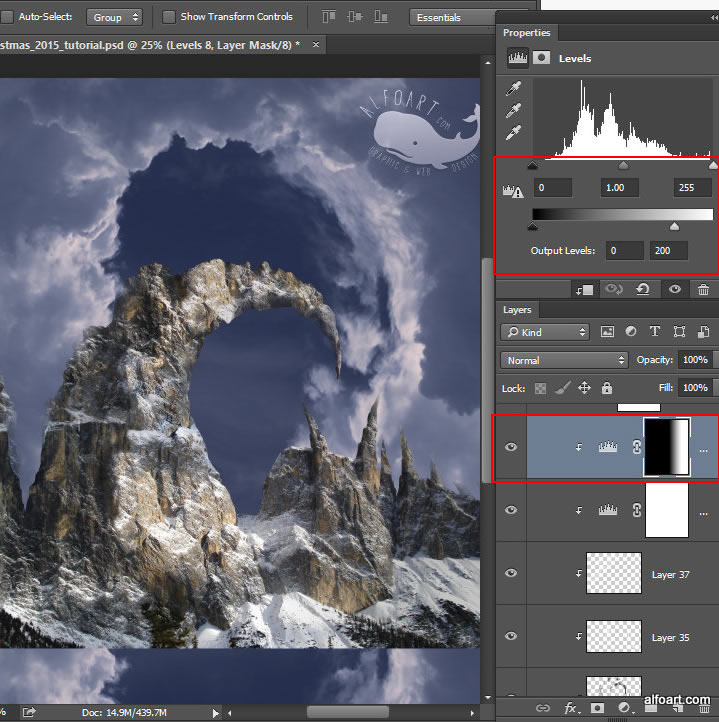
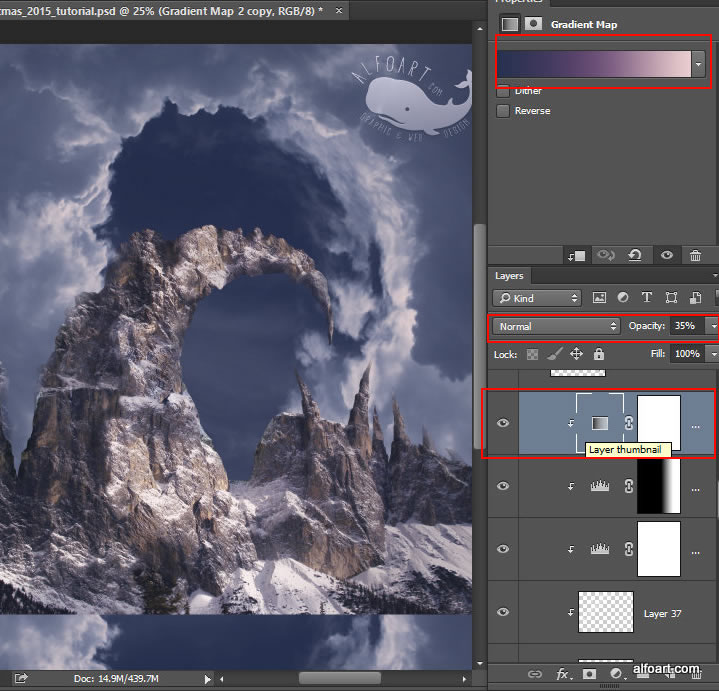
- To blend mountains shades with the background apply "Gradient Map"adjustment layer to them. Use Opacity 35% for this layer, also convert it to clipping mask in order to apply effect only to mountains.
- Add some snow to the mountains using mountains brush with light warm colors.
- Here are the areas where snow effect was applied.
- I smoothed the very top part of the mountain with the another Gradient Map adjustment layer. In order to apply this effect only to the top part of the mountain apply black and white linear gradient to the Layer Mask using vertical direction.