This tutorial will show you how to create glossy fabric texture and apply snake pattern and decorative elements to it. This effect may be used to create elegant card design for your business. You may get .psd* files of "Golden card template"and "Golden card presentation"Photoshop tutorial by making a payment . Put the tutorial title in "Add special instructions to seller" line of PayPal and it will be sent to you shortly.


- Fabric - medium size.
- Snake Skin - 640px
Used images:
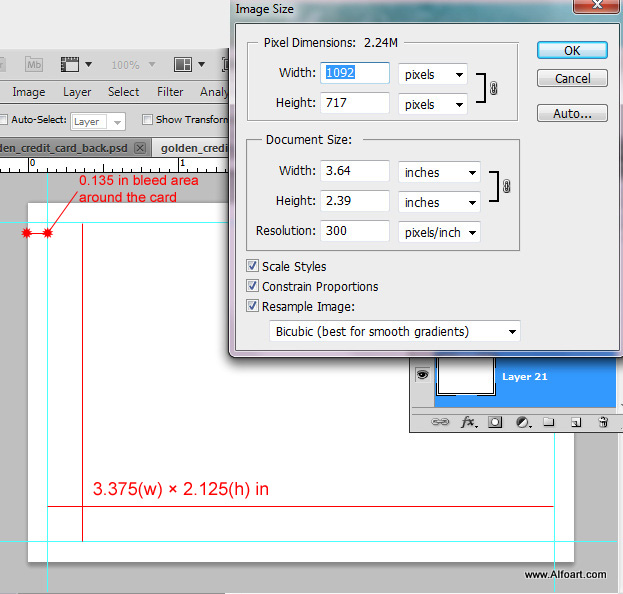
- If you would like to create printable file, use high resolution 300 pixels/inch and 3.64 x 2.39 in size, this size is included the full bleed dimensions.
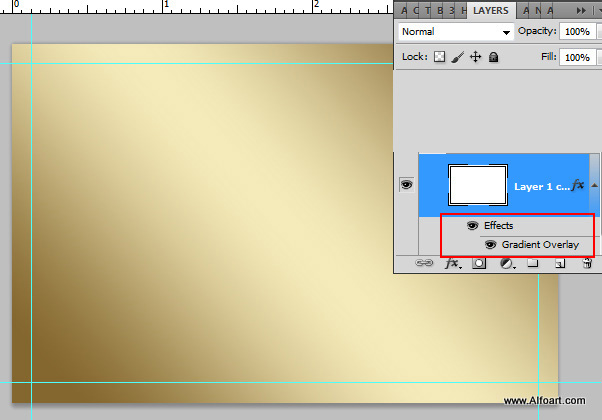
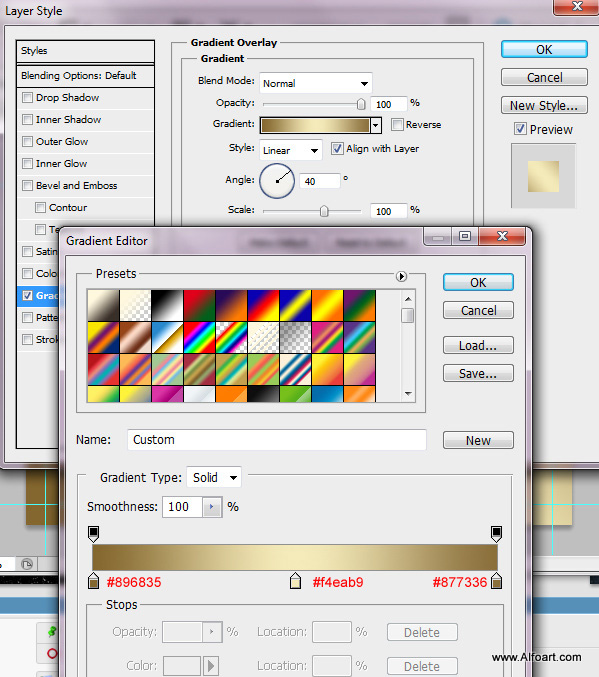
- Unlock the background layer and apply Gradient Overlay layer style effect.
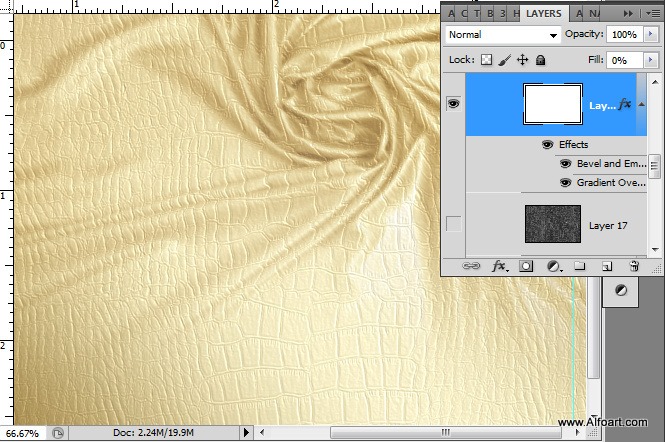
- Insert fabric wrinkles image. Place the fabric knot into the top right part of the file. It's Okay if the bottom part of the fabric doesn't cover background gradient layer a bit.
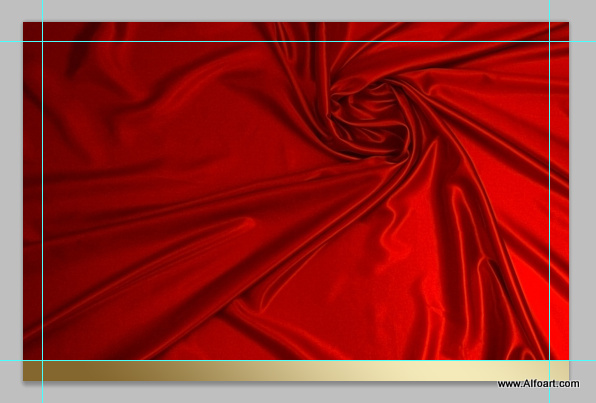
- Add layer mask to the fabric layer. Fill Layer mask with black and white gradient in the bottom part to create smooth transition between fabric and plain background.
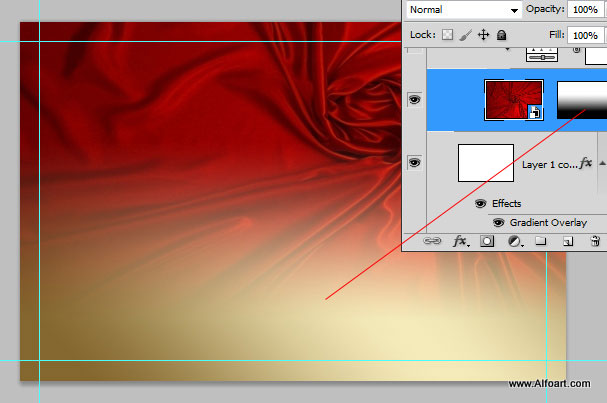
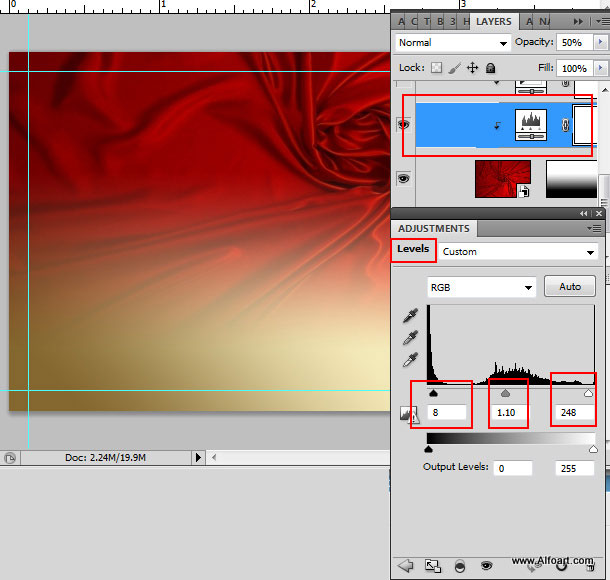
- Add "Levels" adjustment layer above the fabric.
-
Click the New Adjustment Layer button
 at the bottom of the Layers panel, and choose an adjustment layer type.
- In order to apply levels settings only to the fabric layer, right click levels layer and choose "Create Clipping Mask".
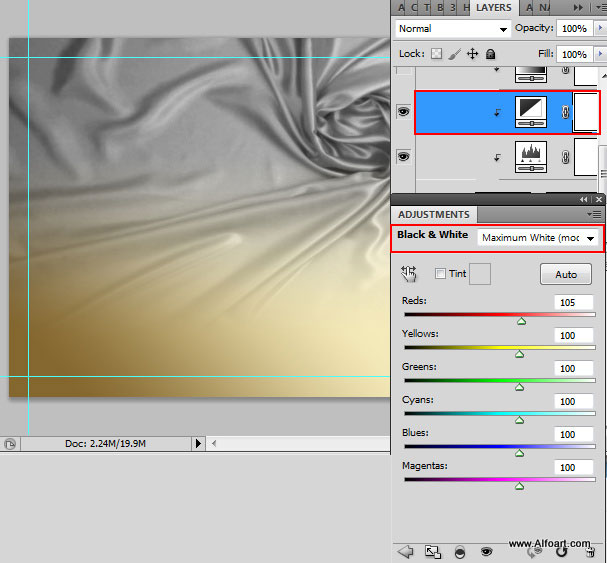
- Add "Black and White" Adjustment layer, create clipping mask as previously.
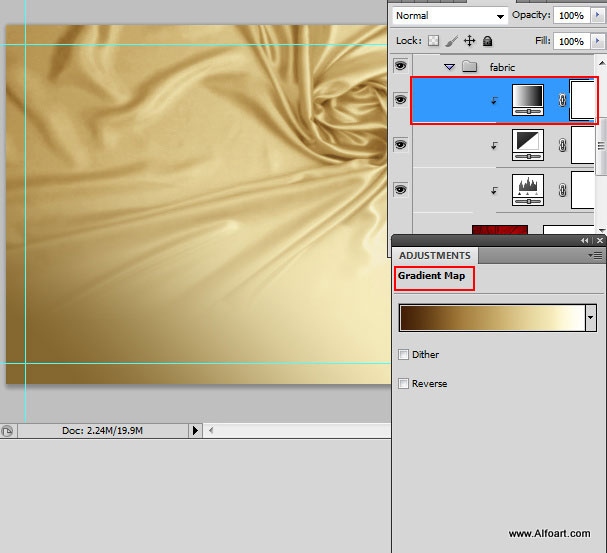
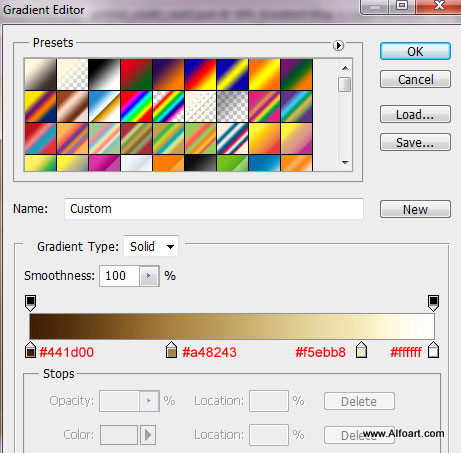
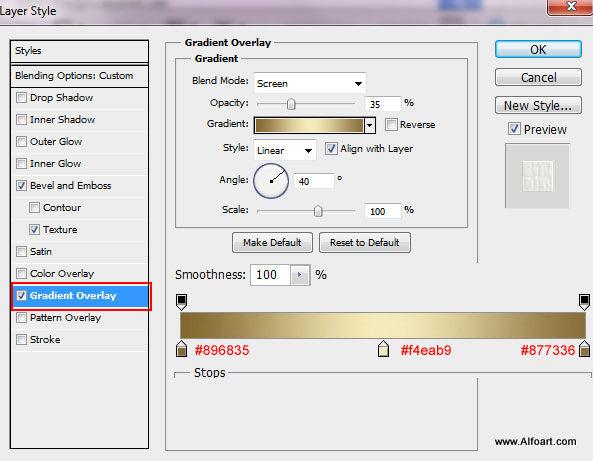
- In order to apply golden shade to the fabric, add one more adjustment layer - "Gradient Map"
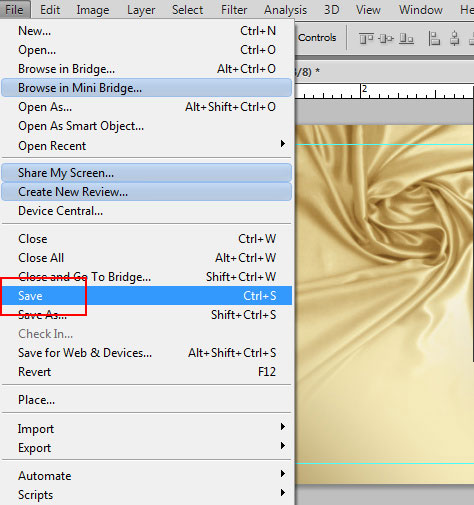
- Save Photoshop document after that. It's important for several future steps. You may save it as a JPG, actually we will need fabric texture from the current stage.
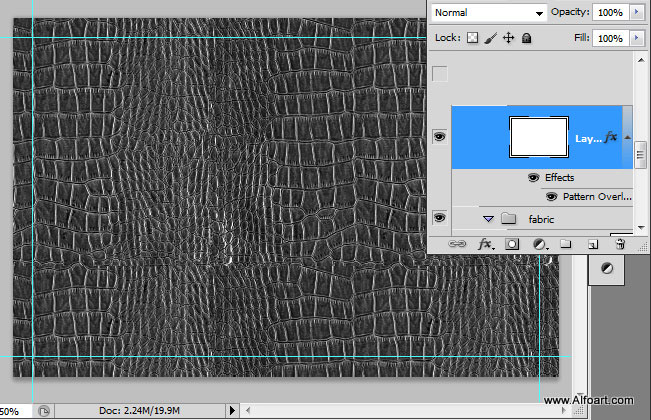
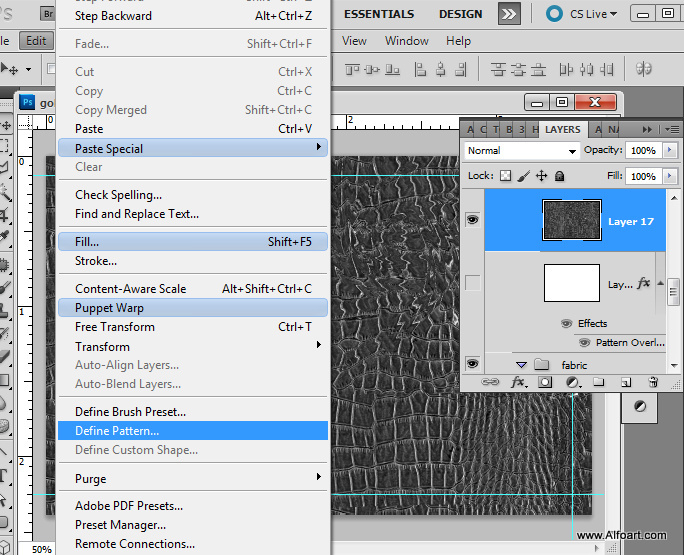
- Create a new layer and apply Snake pattern to it. If you would like to create your pattern, open texture image, make it black and white (Image > Adjustments > Black and White), then go to Edit > Define Pattern.
- Merge patterned layer with the new empty layer to realize layer style effect.
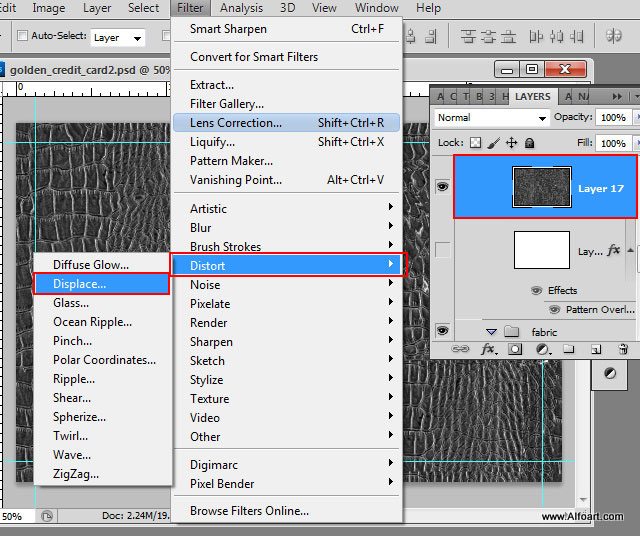
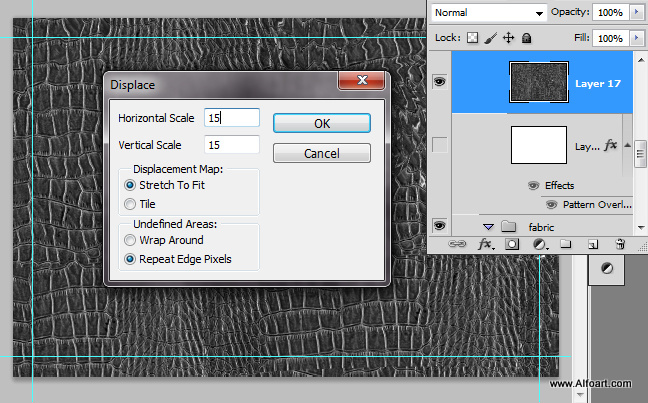
- Then go to Filter > Distort > Displace.
- Use similar settings, you may try your own "Scale" numbers for better result. Click OK, you will see pop up window.
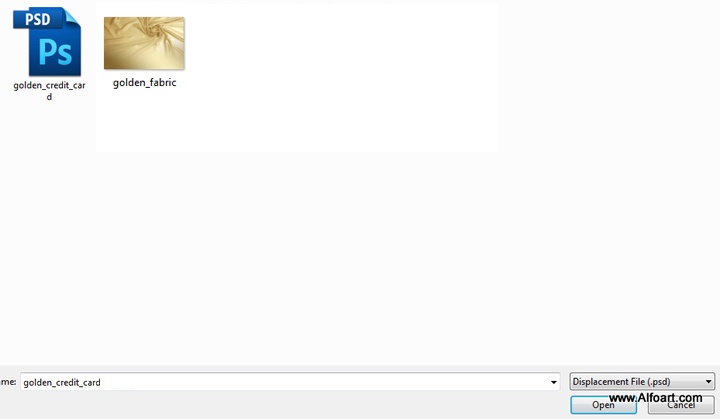
- Find saved Photoshop or jpg file of the card. The psd file should be saved on the stage of creating golden fabric texture.
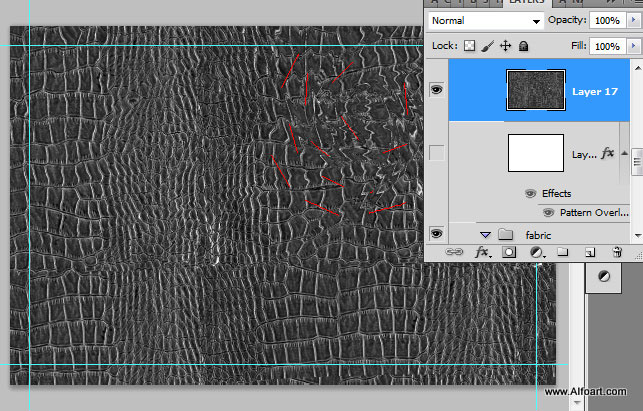
- Here is the result after applying the filter. The patterned layer has fabric wrinkles deformations.
- Create a new pattern after applying filter. Keep active corrected skin layer.
- Go to Edit > Define Pattern.
- Now you can make patterned layer invisible or delete it, we will use only pattern with wrinkles created in previous step.
- Create a new layer, apply Fill = 0%.
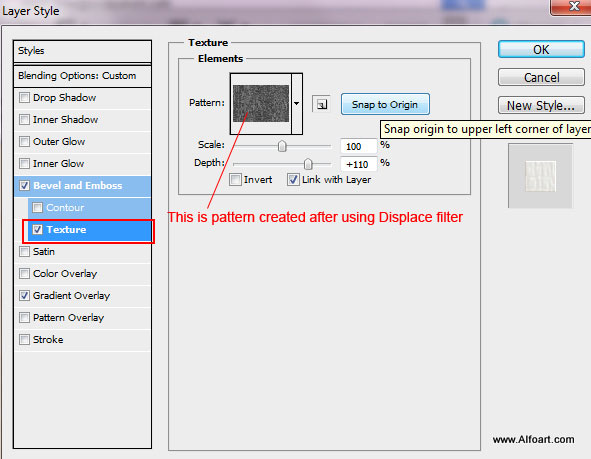
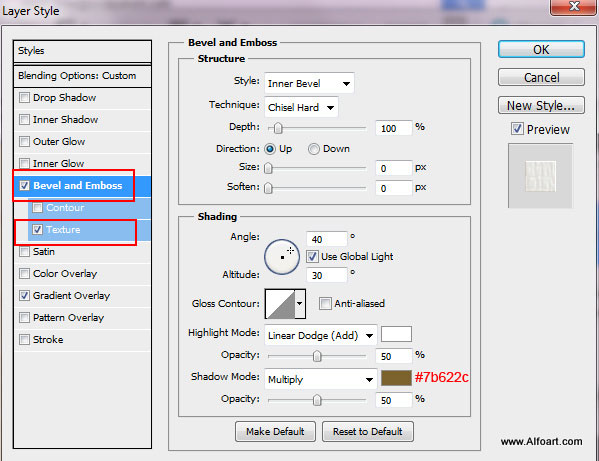
- In order to create "Snake effect layer", apply Bevel and Emboss and Gradient Overlay effects. Use settings from screen shots. Check out pattern wrinkles, they should cover fabric wrinkles.
- Choose pattern created in previous steps.
- The pattern wrinkles should match with fabric wrinkles, if not, try to move pattern position inside the scene. Use cursor to correct pattern position.