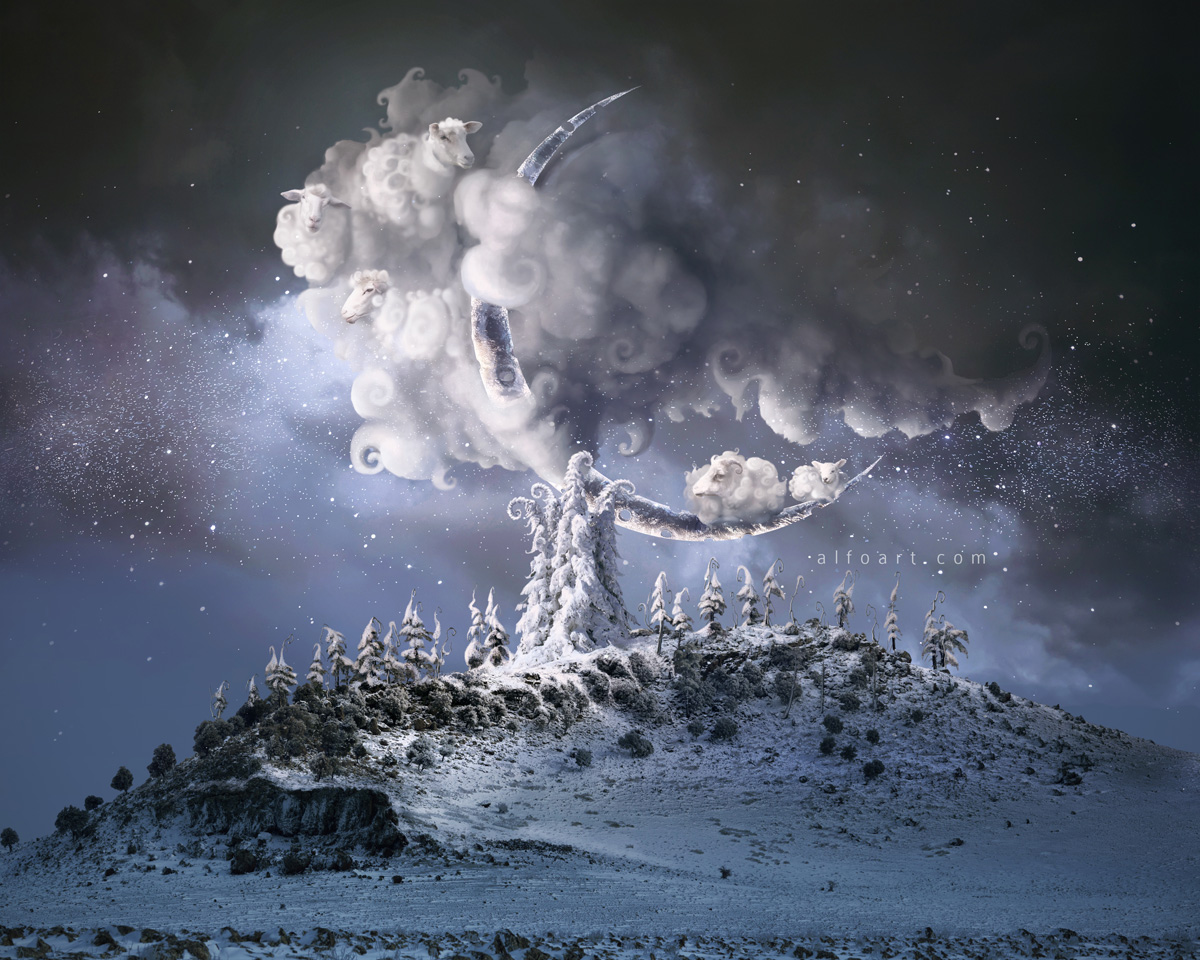
Learn how to create magic photo manipulation with big curly cloud, the crescent above the winter landscape and Christmas trees. You may get large (10 x 8 in, 300px/in) editable .psd* file of "Christmas Dream" Photoshop tutorial by making a payment. Put the tutorial title in "Add special instructions to seller" line of PayPal and it will be sent to you shortly.
Click to enlarge the image.
Used images:
- In this Photoshop tutorial you may find useful tips which can help you to create well blended photo manipulation with some painted elements. This tutorial is written for users who know basic Photoshop tools and settings and who able to work with the medium/advanced difficulty level tutorials. It doesn't contain very detailed description for actions such as "how to create adjustment layer", "how to separate elements from background" and some others, because of big amount of steps.
- Here is the announcing animation with the all stages described in the tutorial:
- Create a new Photoshop document 8 x 10 in and resolution 300 pixels/in.
- Fill the first layer with the blue color #516989.
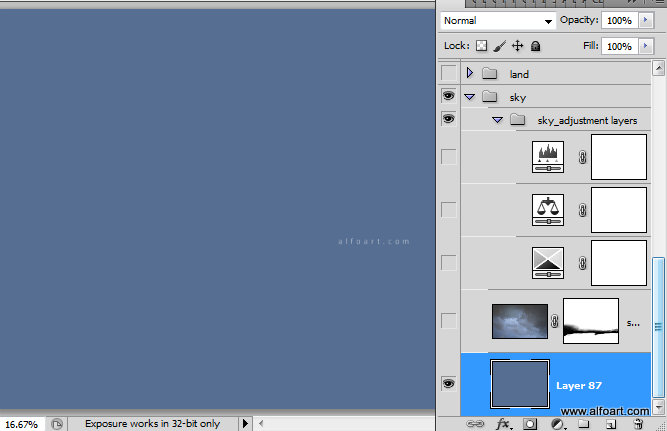
- Insert Sky photo above the blue background.

- Add Layer Mask to the sky image and erase bottom edge of the sky photo with the round soft brush.
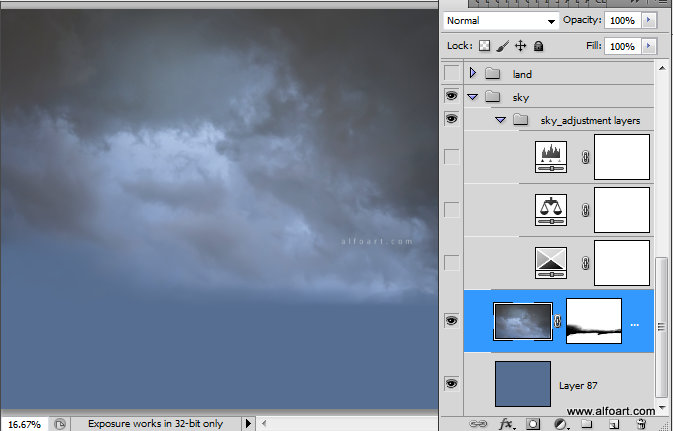
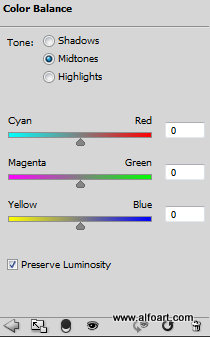
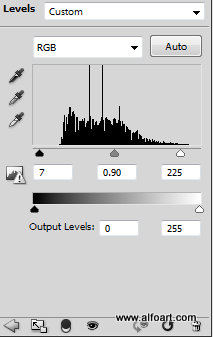
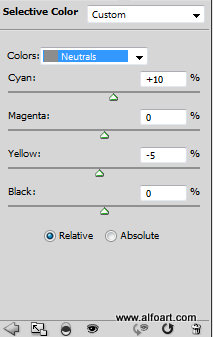
- Add adjustment layers above the sky layer: Selective Color, Color Balance, Levels.
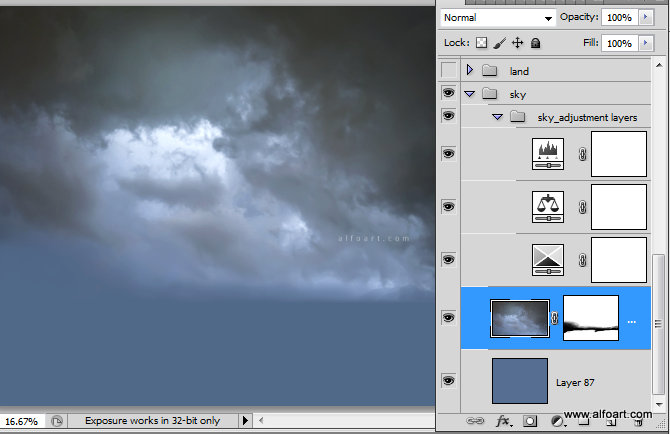
- Here are the settings for the adjustment layers.
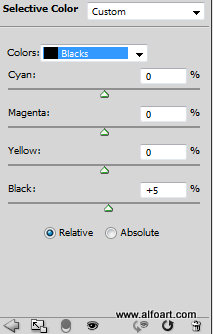
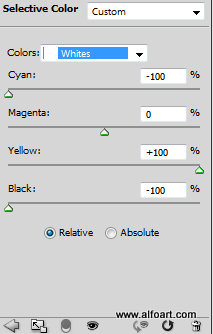
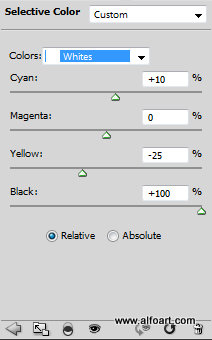
- Selective Color:

- Color Balance and Levels:
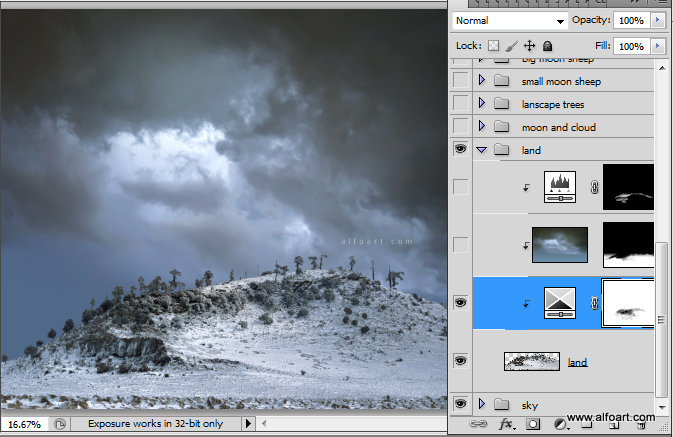
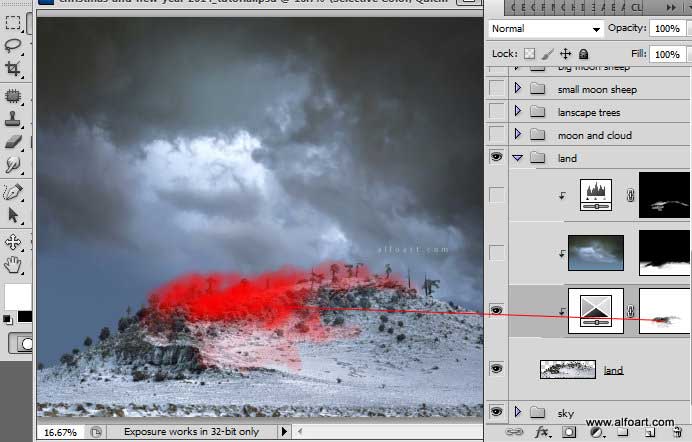
- Insert land image, erase the original sky area of this layer. I used Filter > Extract option.
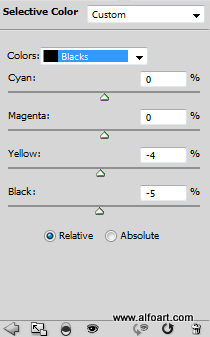
- Add Selective Color adjustment layer. Convert this layer to "Clipping Mask" in order to apply settings only to the land layer.
- Adjustment "Selective Color" layer settings:

- Correct the adjustment layers effects visibility in order to apply adjustment layers settings only for areas where they are needed. For example, Selective Color adjustments make image darker but we need to save some light areas.
- To keep light colors in the center top part of landscape (below lightest spot of the sky), process adjustment layer mask with the soft and translucent brush in the marked area.
- Return to the Sky layer, duplicate it. Place duplicate above the land layer and convert it into "Clipping Mask". Move "sky clipping mask" down in order to cover land area.
- Apply Multiply Blending Mode and Opacity around 80%
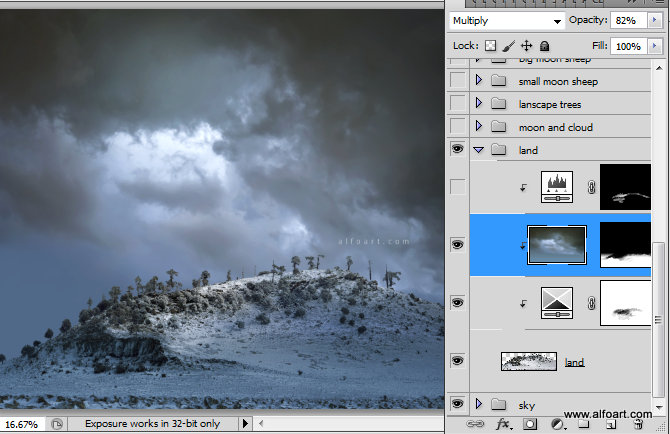
- Process the Layer Mask of this layer with the soft brush in order to clean up the top center part of the land from the dark sky shades.

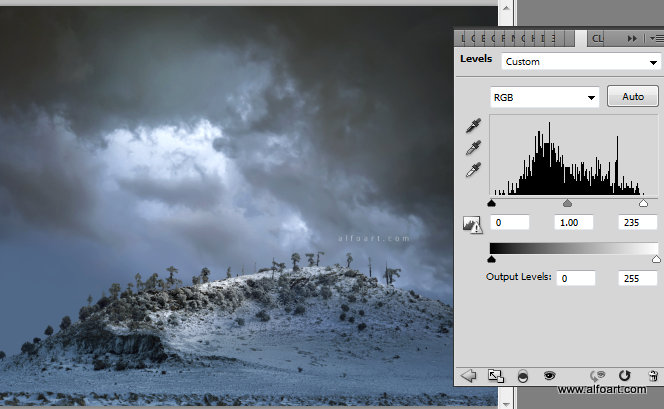
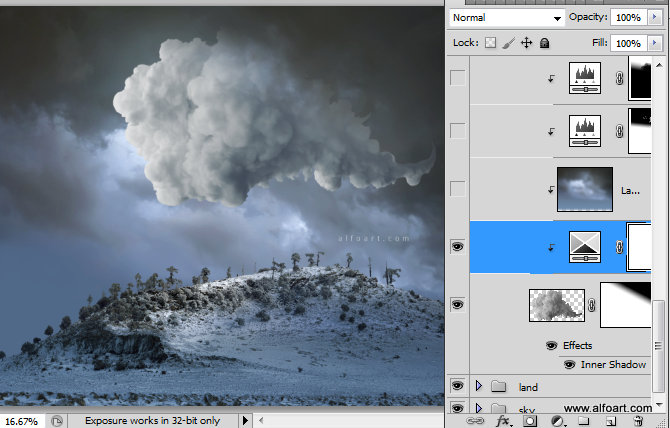
- Add Levels adjustment layer/clipping mask. Leave visible only very top part of the land area for this layer.

- Here are the settings for the Levels layer:
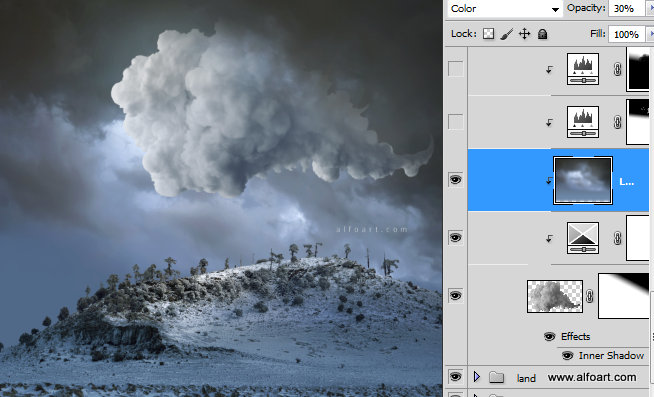
- Create a new empty layer and insert the cloud:
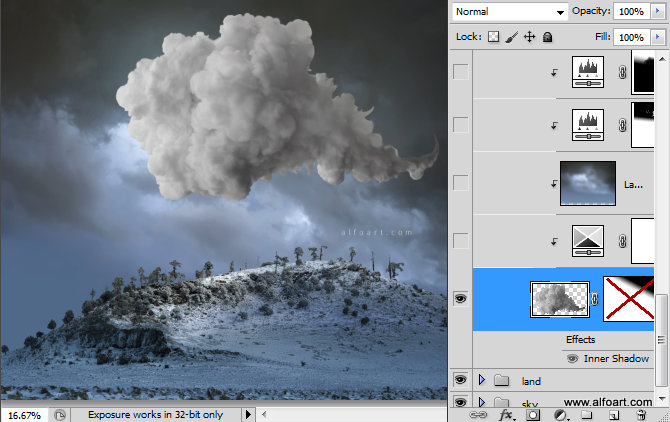
- Add the Layer Mask and fill the top right corner of the mask with the black and white linear gradient.
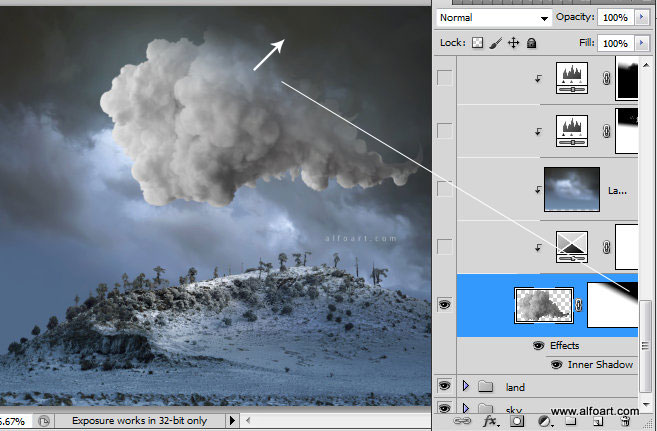
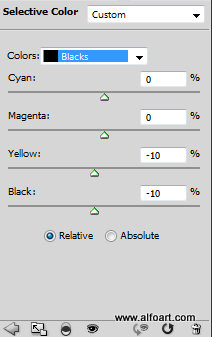
- Add adjustment layer/clipping mask "Selective Color" to the cloud layer.
- Use settings from screen shot below:
- Duplicate Sky layer again. Put it above the cloud and convert it into the clipping mask. Apply Gaussian Blur filter (~10) to it, Color Blending Mode and Opacity 30%.