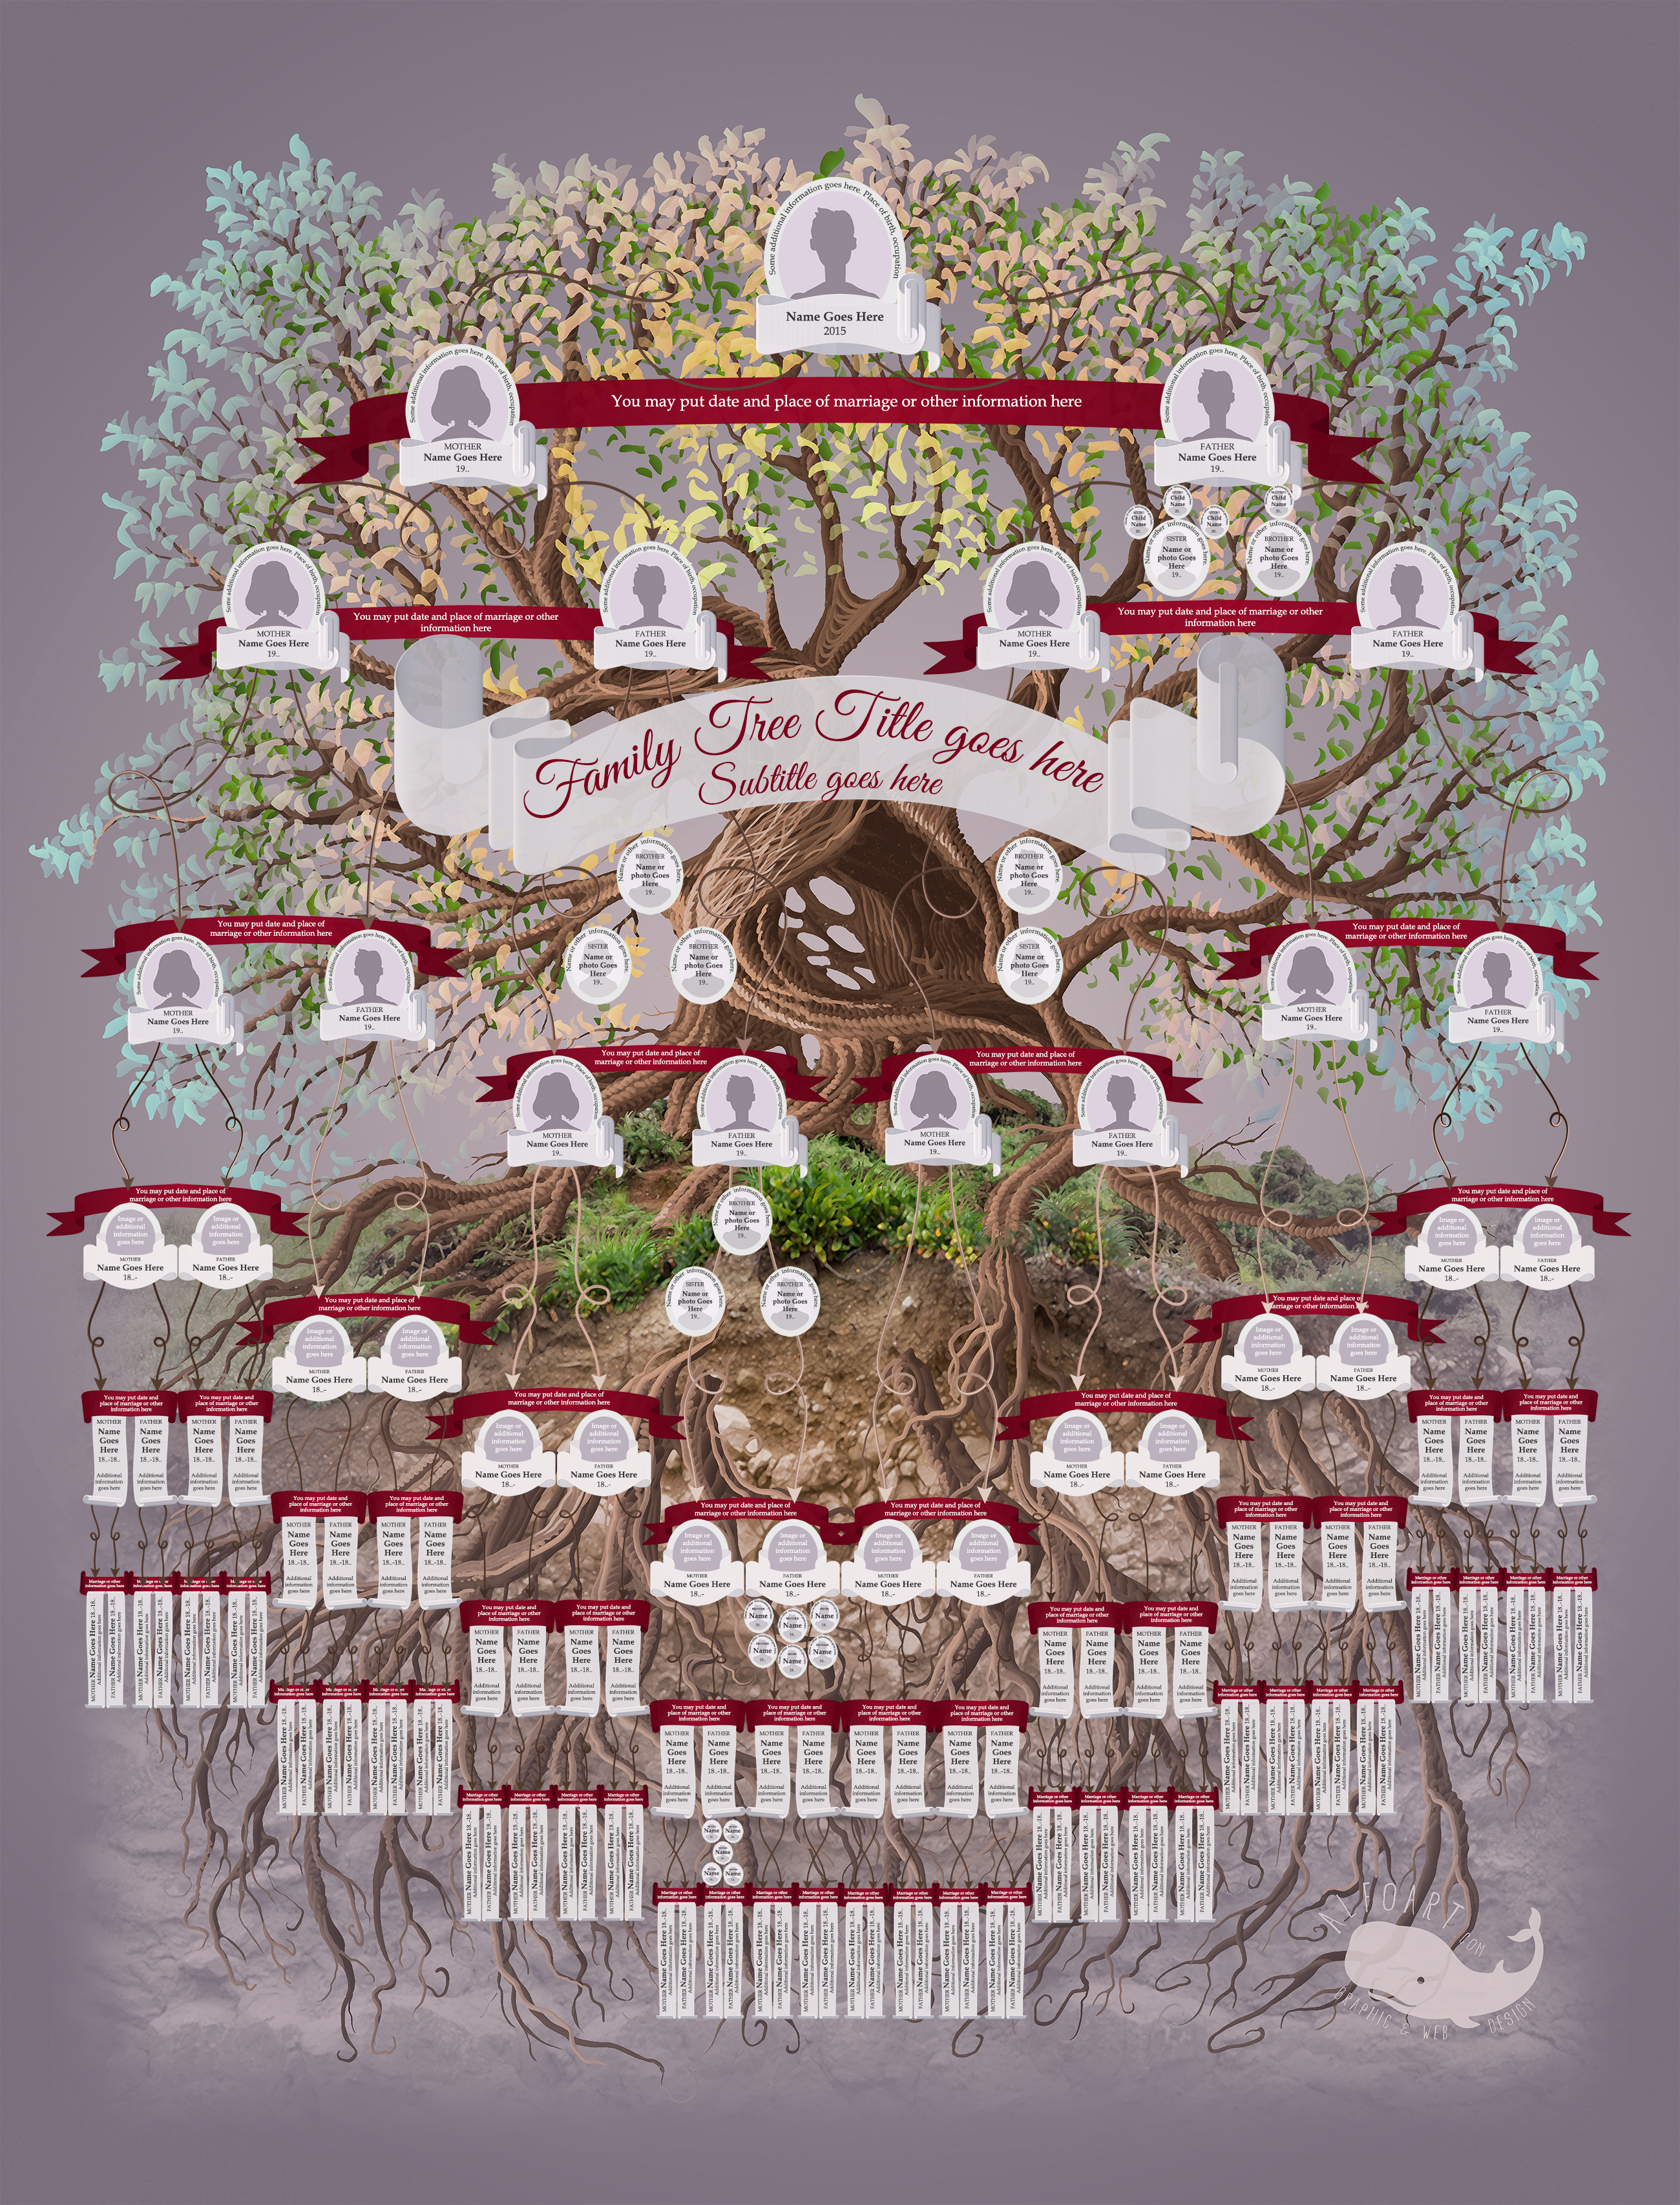
Family Tree Template
Get editable Family Tree Template or create your own by using Photoshop Mixer Brush Tool techniques. Learn how to create fantasy tree and find out the easiest way to make beautiful banners, scrolls and ribbons.
You may get large (30x40 inch plus 2 inch bleed area, 300px/in, file size is 543 Mb) .psd* file of "Family Tree Template" Photoshop tutorial by making a payment. Put the tutorial title in "Add special instructions to seller" line of PayPal and it will be sent to you shortly.
Download Great Vibes script font for the central banner or use different one.
Click image to see the larger version of the Family Tree Template (2600px) . The original illustration is much larger, it is 30x40".
Here are some useful techniques which can help you to create "Family Tree template" design elements.
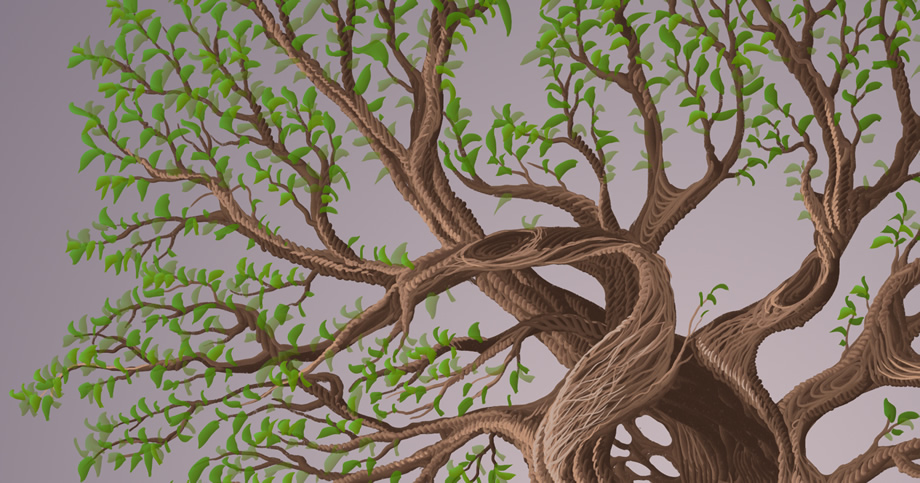
Part I. Family Tree bark and leaves.
- In order to create the Family Tree with similar texture please, download the brushes set and samples for the Mixer Brush Tool

- Open Photoshop document, insert .png image with the Mixer Brush samples (round gradients)
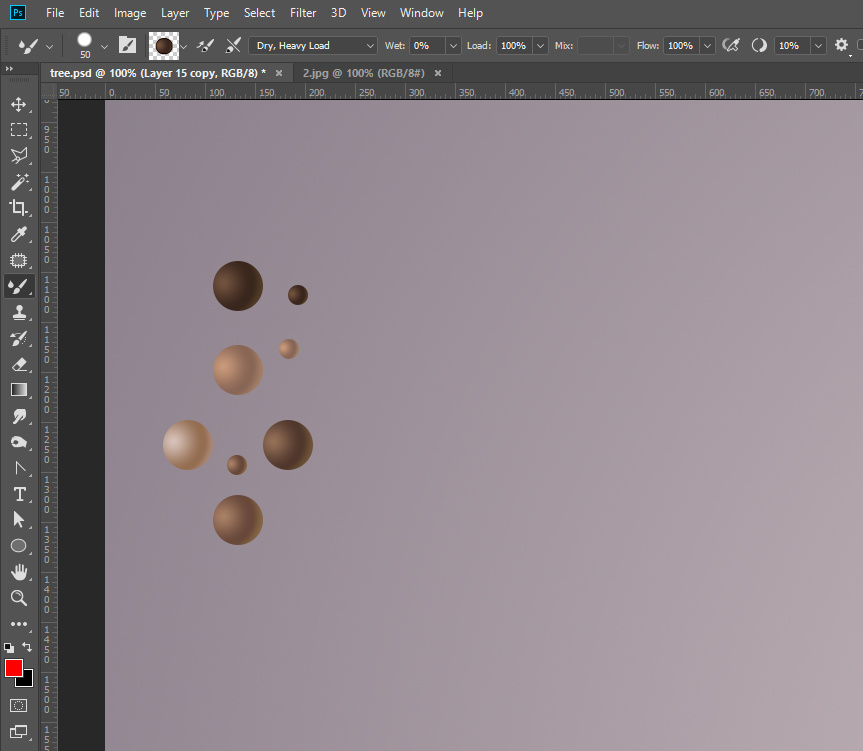
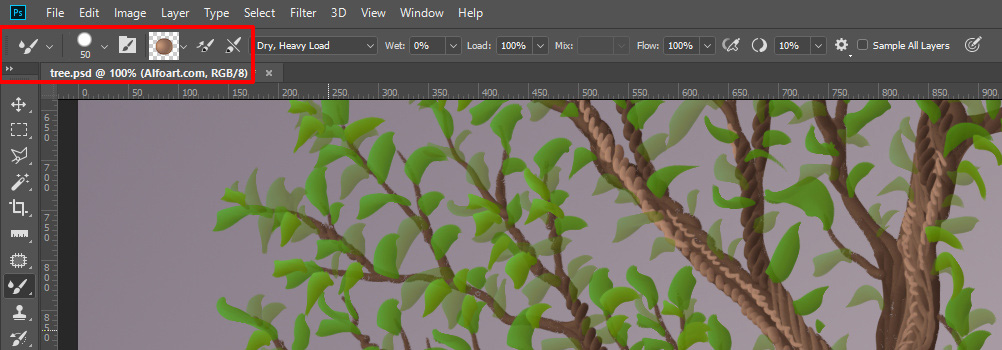
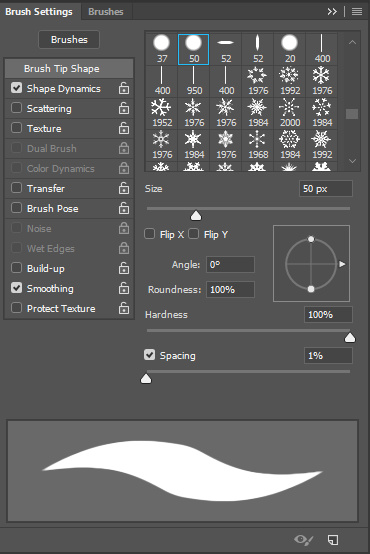
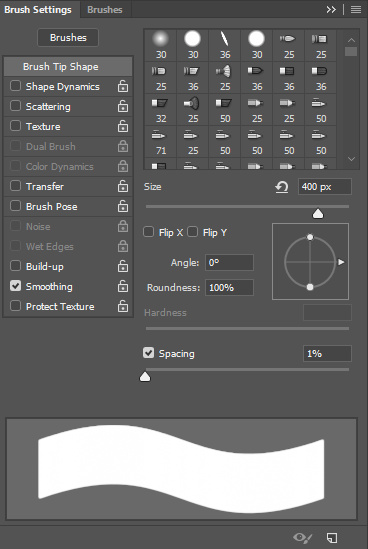
- Choose Mixer Brush Tool. You may try brushes from the Brush Set but also you may choose regular round preset brush, then alt+click above the sample circle. Use 50px size brush for bigger circles and 20px brush for the small ones. The brush size should be around the same size as sample shape. You may create your own gradients and play with the brush settings. If you are using the latest version of PS CC, try to increase Smoothing option
 , it may help to better control line shape.
- Use shape Dynamics and Spacing 1%
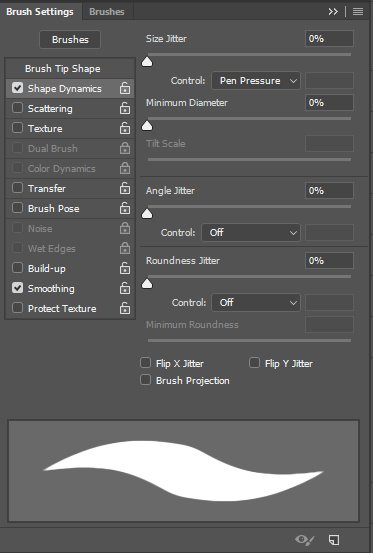
- Use smaller roundness (~20%) and Pen Pressure Angle Jitter.
.jpg)
.jpg)
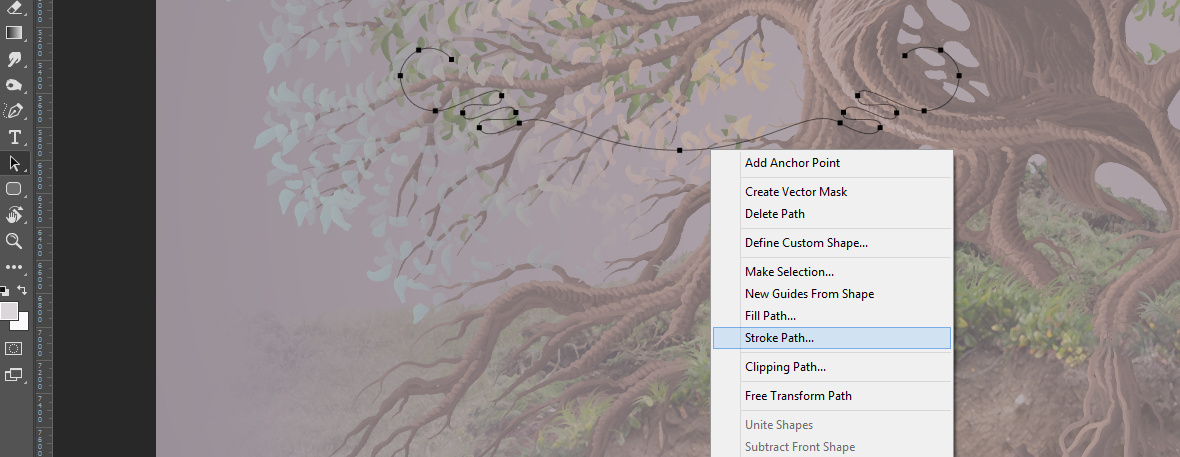
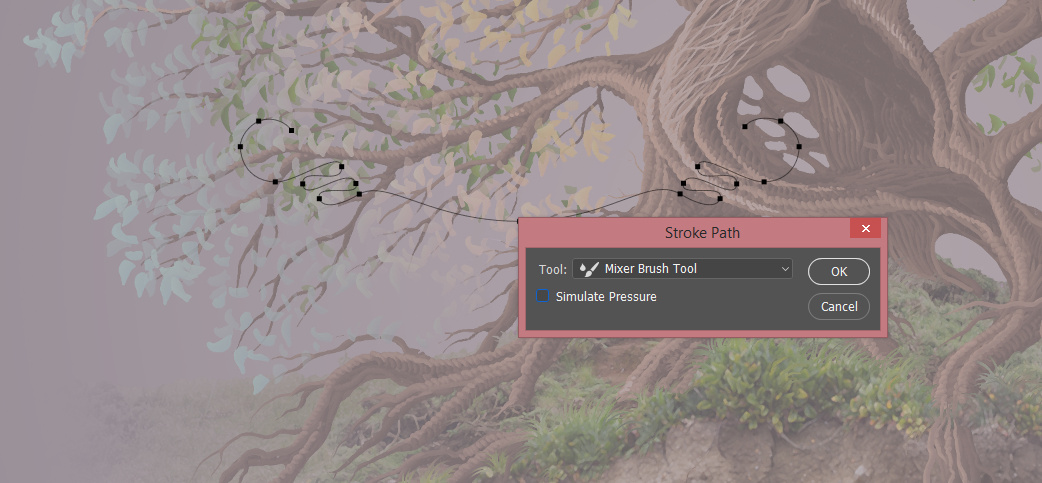
If you don't use Pen and drawing Tablet you may create smooth path with the Pen Tool, then right click path and choose "Stroke Path", then apply "Mixer Brush Tool" and check box "Apply Simulate Pressure". - Check out the video how to use Mixer Brush Tool in action.
Part II. Create Banners and ribbons for Family Tree Template with the Mixer Brush Tool.
- Use very similar method to create beautiful banners with the Mixer Brush Tool. The difference is only the shape of brush and sample shape and color. You can find long and slim Banners brushes in the previous brushes set.
- You may create your own banner brush and sample. The brush and the sample should have the same size and shape. The shape of brush is the rounded rectangular, create it with the Rounded Rectangular Tool. Use Black color to create brush shape. Load selection for created shape, The go to Edit > Define Brush Preset.

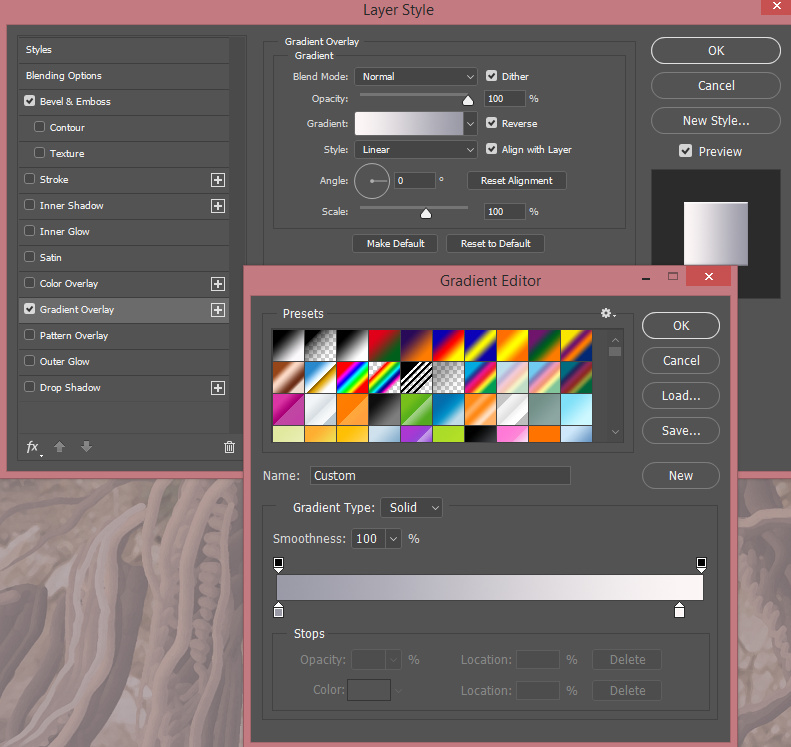
- Use Layer Style effects for the duplicated shape from screen shot below or try different settings.

- Choose layer with the sample shape, right click the layer, choose Rasterize Layer Style. Then take Mixer Brush Tool. First, choose created brush preset (black rounded rectangular) then Alt + Click above the sample shape. Try to play with the Mixer Brush settings. You may try to decrease Flow amount. This can help to add volume to the banner shape. If you draw the banner with the pen or mouse this setting can be around 20-30%. Use 55-70% when you create banner by adding stroke to the path. Increase Smoothing option up to 100% for better line shape control. You may notice, the banners and ribbons created by using Mixer Brush Tool technique are not symmetric. It order to create symmetric banner you may just cut the half of the banner, duplicate remaining portion of the banner, flip it horizontal and merge two parts.
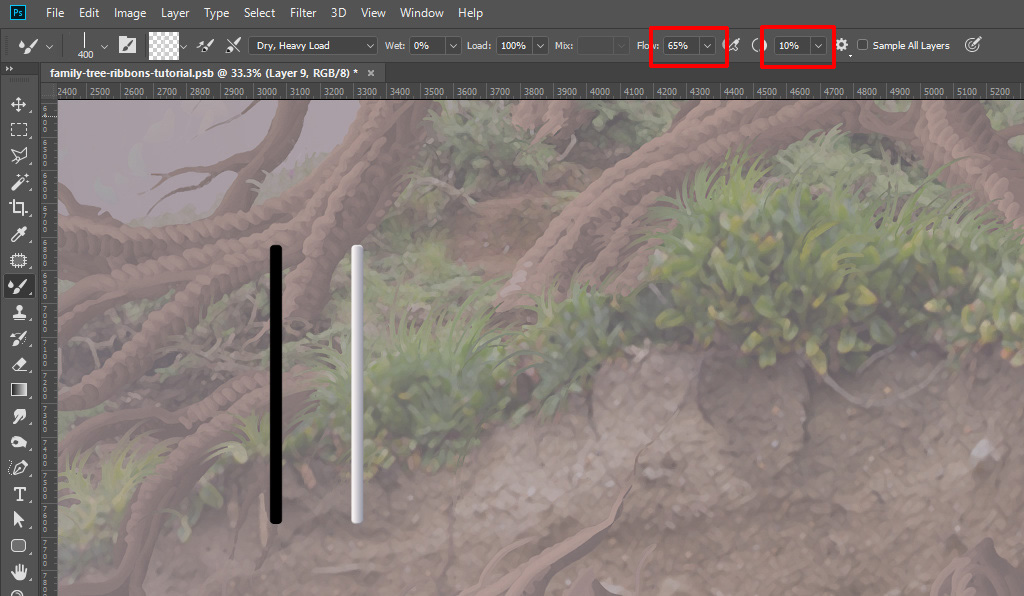
- Spacing should be 1-10%.
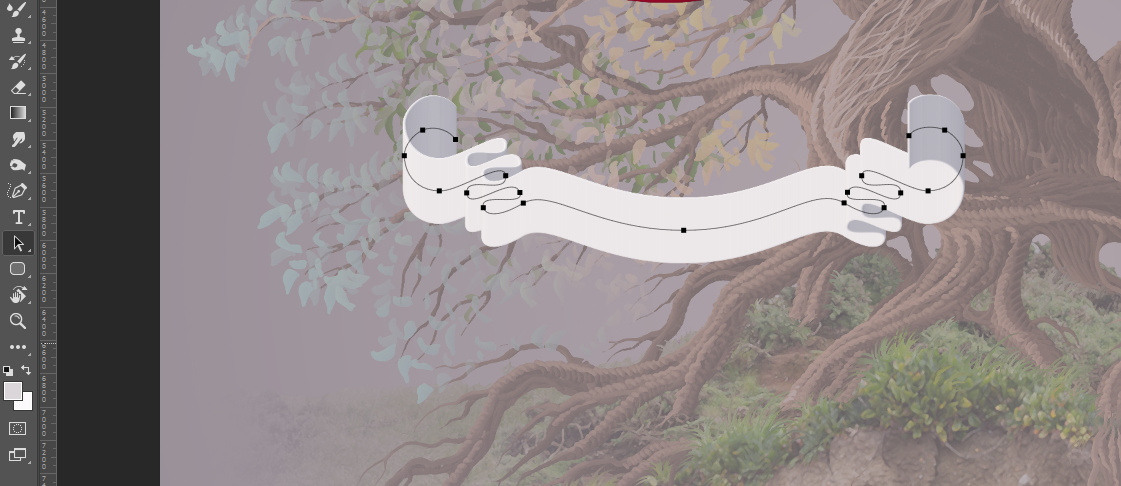
- Here is the example of creating banner by using path. Take the Tool, draw the line for the future banner, then right click the path, choose Stroke Path.
- Watch banner Mixer Brush Tool in action.